Forum Replies Created
-
AuthorPosts
-
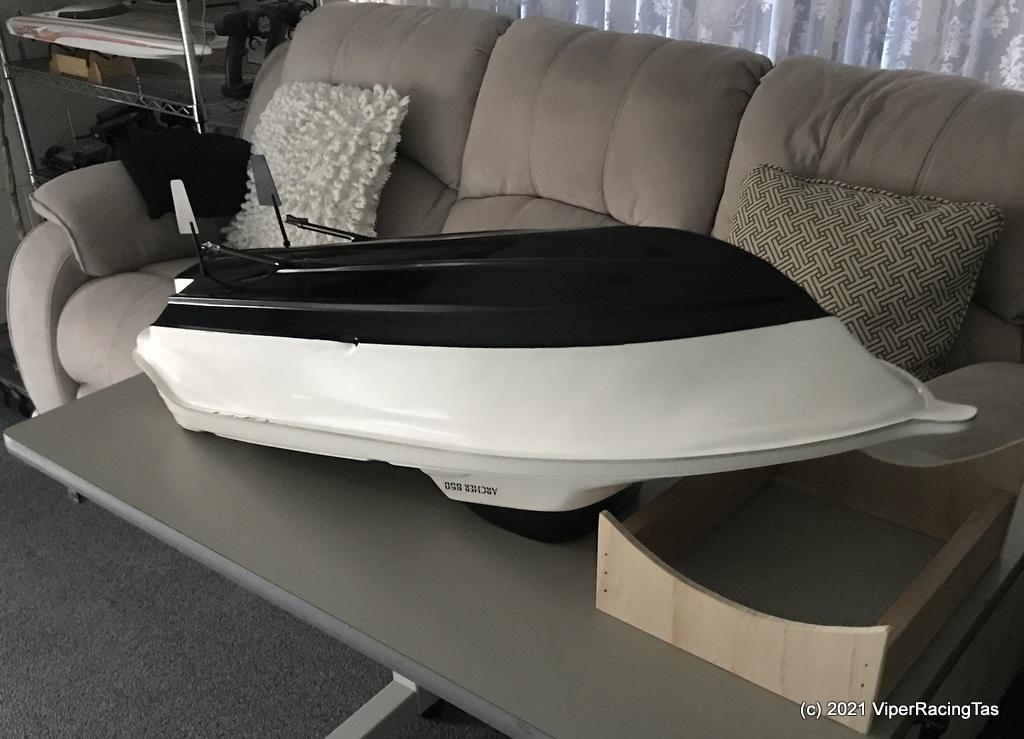
31 August 2021 at 17:16 in reply to: Predators Double Trouble scale Archer 650 – 6.5m offshore Runabout -Rebuild #9179
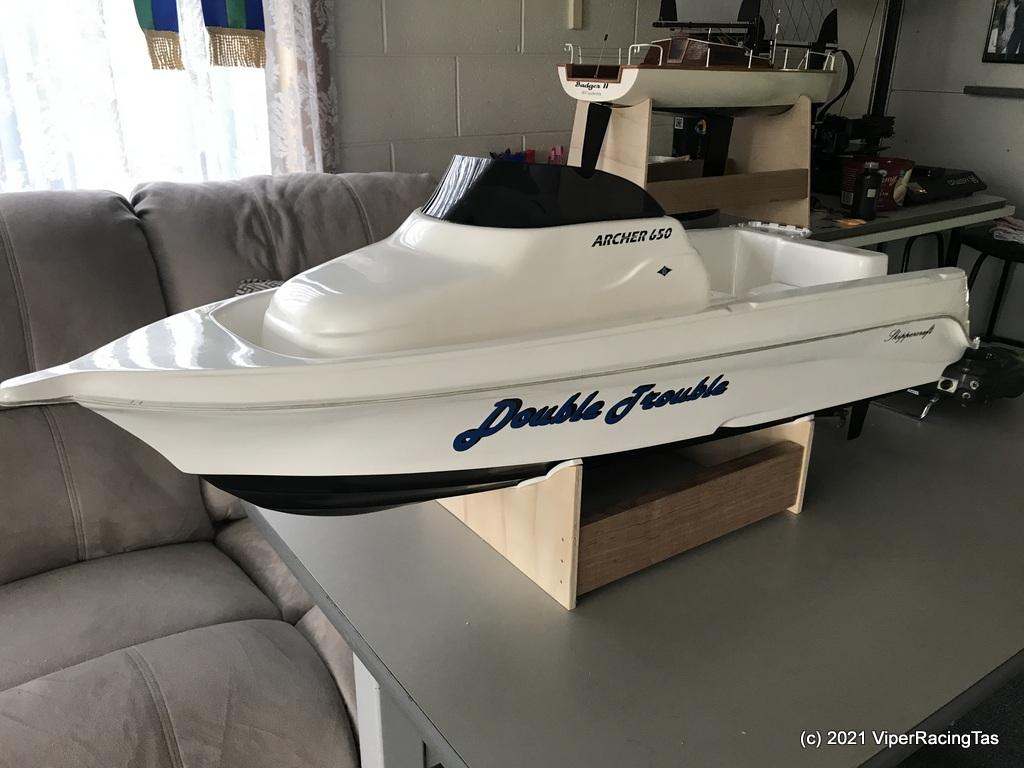
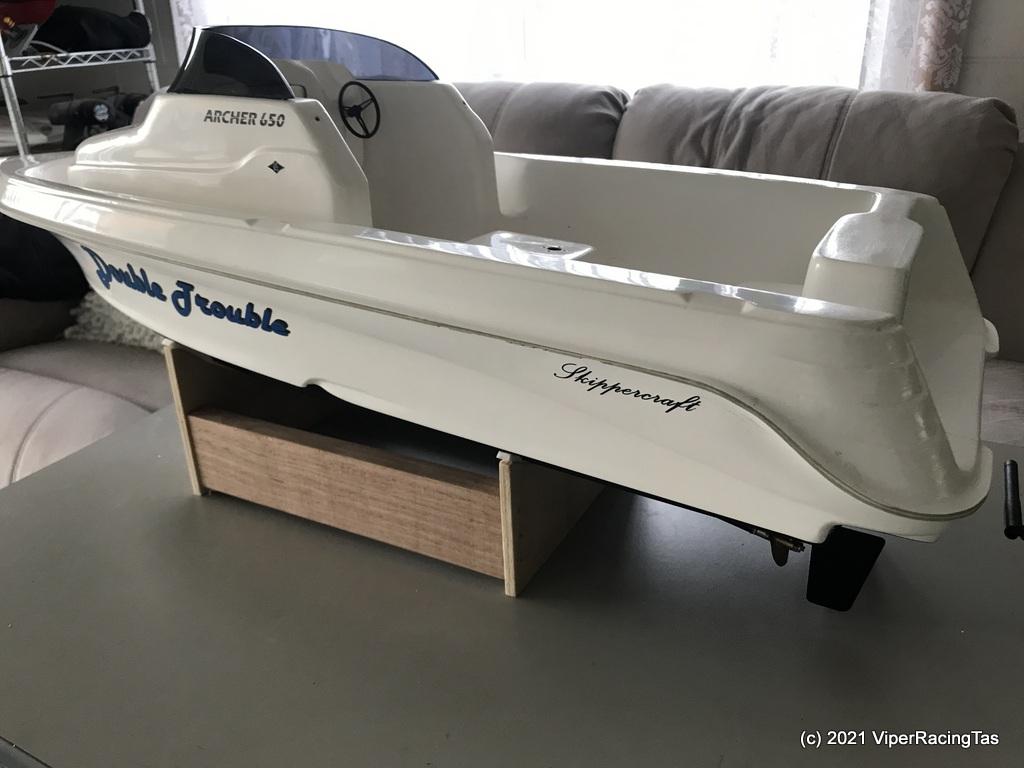
While “Double Trouble” is still far from finished it is a least now sitting on it’s own display stand and it is all fully functional ready for on water testing.
Just want to make sure it runs as expected with the new brushless setup and that the steering is satisfactory.
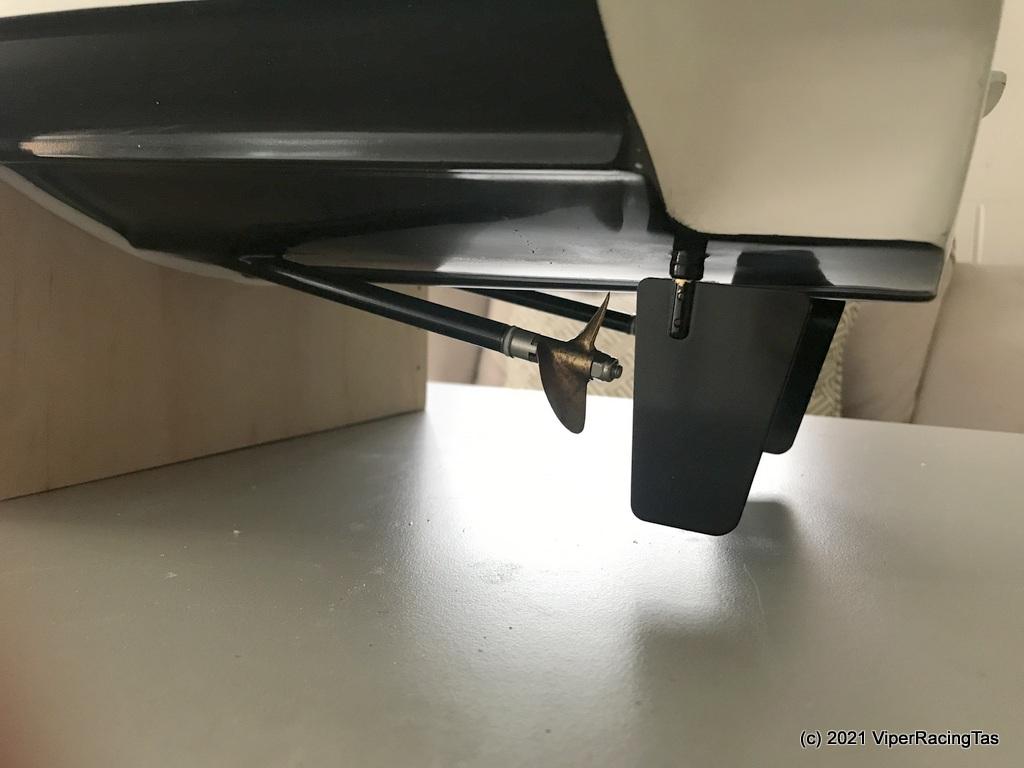
One of the props is badly out of balance so will either need balancing or I may need to replace the pair if they don’t match up with the new motors.
I’ve left the Hardtop off for this first round of tests but eventually it will go back on once the interior is all tidied up.
May get a test run this Saturday if the weather is favourable.
Top Quality videos from all today.
Another fine day of flying (and some crashing) but mostly flying.
Thanks for providing the BBQ once again Kermit. Maybe you pranged tour Toledo Special but at least it didn’t affect the BBQ lunch !!
No doubt we will do it all again next week.
Nice.
I feel a bit better now, yours is about as bumpy as my Sky Shadow.
Brilliant video, only spoilt by the crappy music !!
27 August 2021 at 16:32 in reply to: Predators Double Trouble scale Archer 650 – 6.5m offshore Runabout -Rebuild #9141With the big rudders I should not need differential thrust, however it’s easy enough to add if necessary.
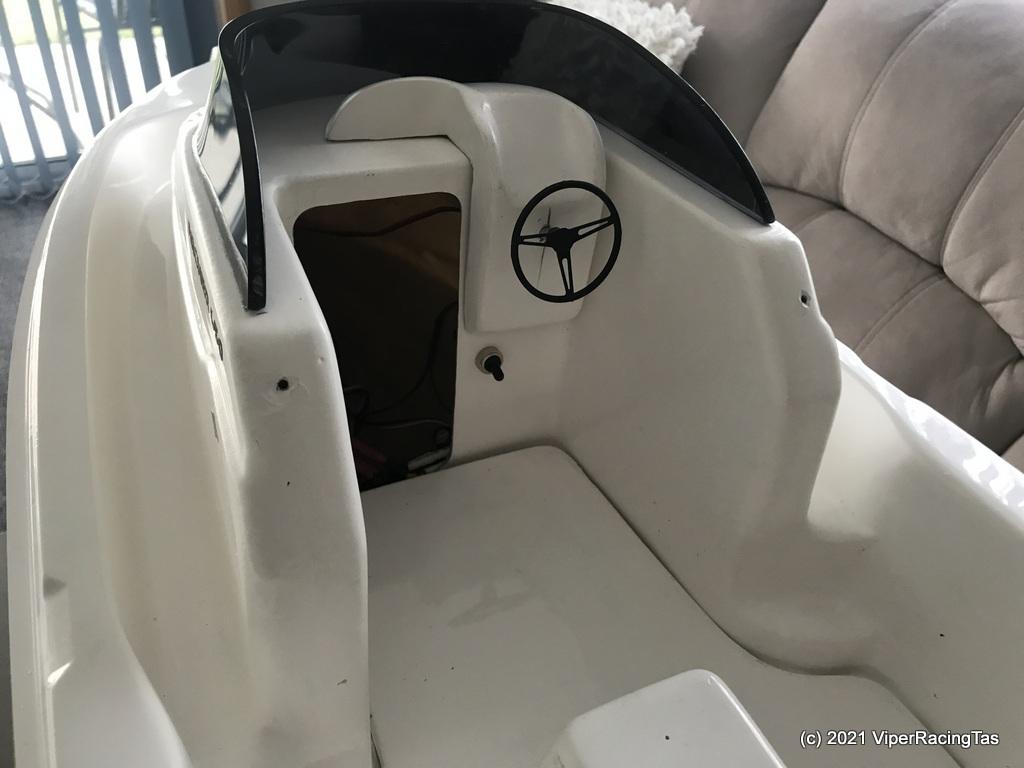
I’ve just bodged it together to see how it performs with the new motors. Once I know it all works correctly then fancy bits can be added.
You know you can’t rush these things !!
27 August 2021 at 15:30 in reply to: Predators Double Trouble scale Archer 650 – 6.5m offshore Runabout -Rebuild #9139Driveshaft couplings arrived early from downtown China so the motors are now installed ready for the first on water test run.
Methinks there is something nefarious going on in the Awards system.
May have to look at banning it.
Always a worry when the winner doesn’t even have a video in the mix this week.
I know there were some naysayers with my predictions of the weather today (even Mr Moose wasn’t convinced & was a no show today) but overall it was a very pleasant flying day, especially after lunch-as suggested.
As Chris stated there were no incidents of note today but it wasn’t for the lack of planes in the air. Everyone had multiple flights with multiple aircraft (as it should be) and all came home in one piece.
The Around the Field video is finished, the onboard stuff may take a little longer.
That’s it from me, the other two RunCam2 videos were corrupted. I think there is a bug in the latest firmware update. I’ll go back to an earlier one before next flight.
It sounds more like a Sports Car now than the Tiger Moth of old.
Don’t know about the Jello though, not one of the better points of the keyring cameras. I have a similar problem (to a lesser degree) with the Sky Shadow.
Looks like Hoppy renamed you “UG” in his post, sounds more like the noise Kermit makes every time you stomp on him.
23 August 2021 at 16:36 in reply to: Predators Double Trouble scale Archer 650 – 6.5m offshore Runabout -Rebuild #9084Still got 2 x Victoria RC yachts & the Wizzle Wozzle A Class to finish + some minor repairs on the N12 yacht. Then the Mystic 32 Offshore Racer is still waiting for repairs from where it hit the old (yes, old) jetty @ the canal.
Don’t think I’ll run out of projects any time soon.
But at least the list is getting shorter !!
23 August 2021 at 16:05 in reply to: Predators Double Trouble scale Archer 650 – 6.5m offshore Runabout -Rebuild #9082Still plodding away with Double Trouble.
Got the hull primed last week , also got the display stand built.
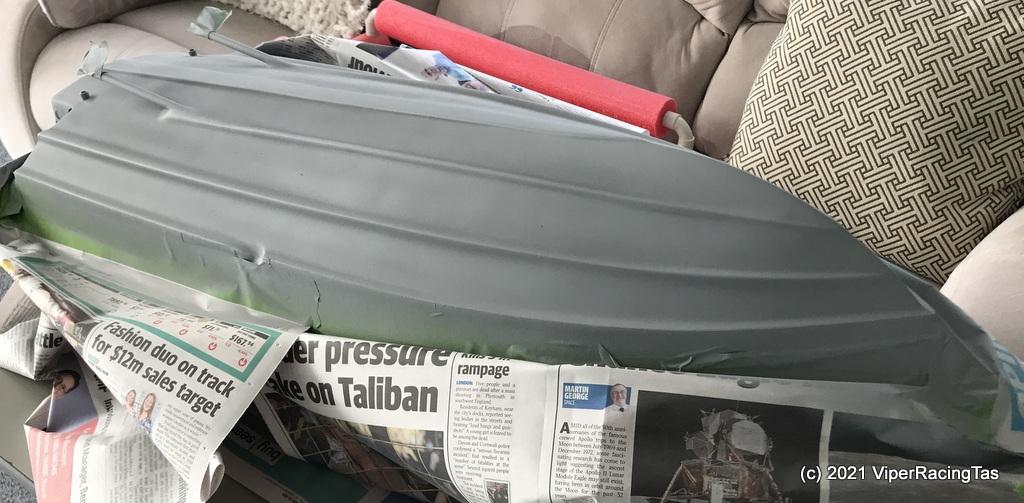
Today the topcoat went on the underwater area.
I’ll give it a day or two for the black to harden up then a quick cut & polish of the whole hull below the gunwales, add the signage, rudders & props and that will be about the extent of it for a few weeks till the drive couplings arrive.
I’ll need to get the stand for this & Badger II epoxied as well, soon as we get a nice warm day.
Well, while Uncle G’s aerial video was quite spectacular (as aerial videos usually are) the venue was wrong (certainly not the canal we know & love) and overall I would join with Bodge in giving Kermit my vote.
It was quite an artistic effort from our sick little frog however I must agree with one comment (from one that shall remain nameless) that the shot of the
sewerstormwater discharging did take away from the overall ambiance and would have better been left out. Same for the finishing shot of therubbishtreebranch stuck in the mud.Other than that I thought the clips through the trees & grasses were a nice touch.
Hope you got written permission to include the kids in your video though, you know how much of a stickler for political correctness YouTube has become of late.
Just my thruppence worth!!
Hoppy, you are a game man nominating anyone before ALL the days entries are in.
Don’t want to get the little Green Frog offside !!
Great to see a couple of new boats this week.
Very nice indeed.
Thanks Uncle G.
-
AuthorPosts