Forum Replies Created
-
AuthorPosts
-
Two 120 Amp ESC’s fitted.
Plumbing installed for the cooling system.
Covers printed to fit over the end of the shafts. (Stops water and grease flying around the boat)
All shafts greased and universals covered in heatshrink and lubricated.
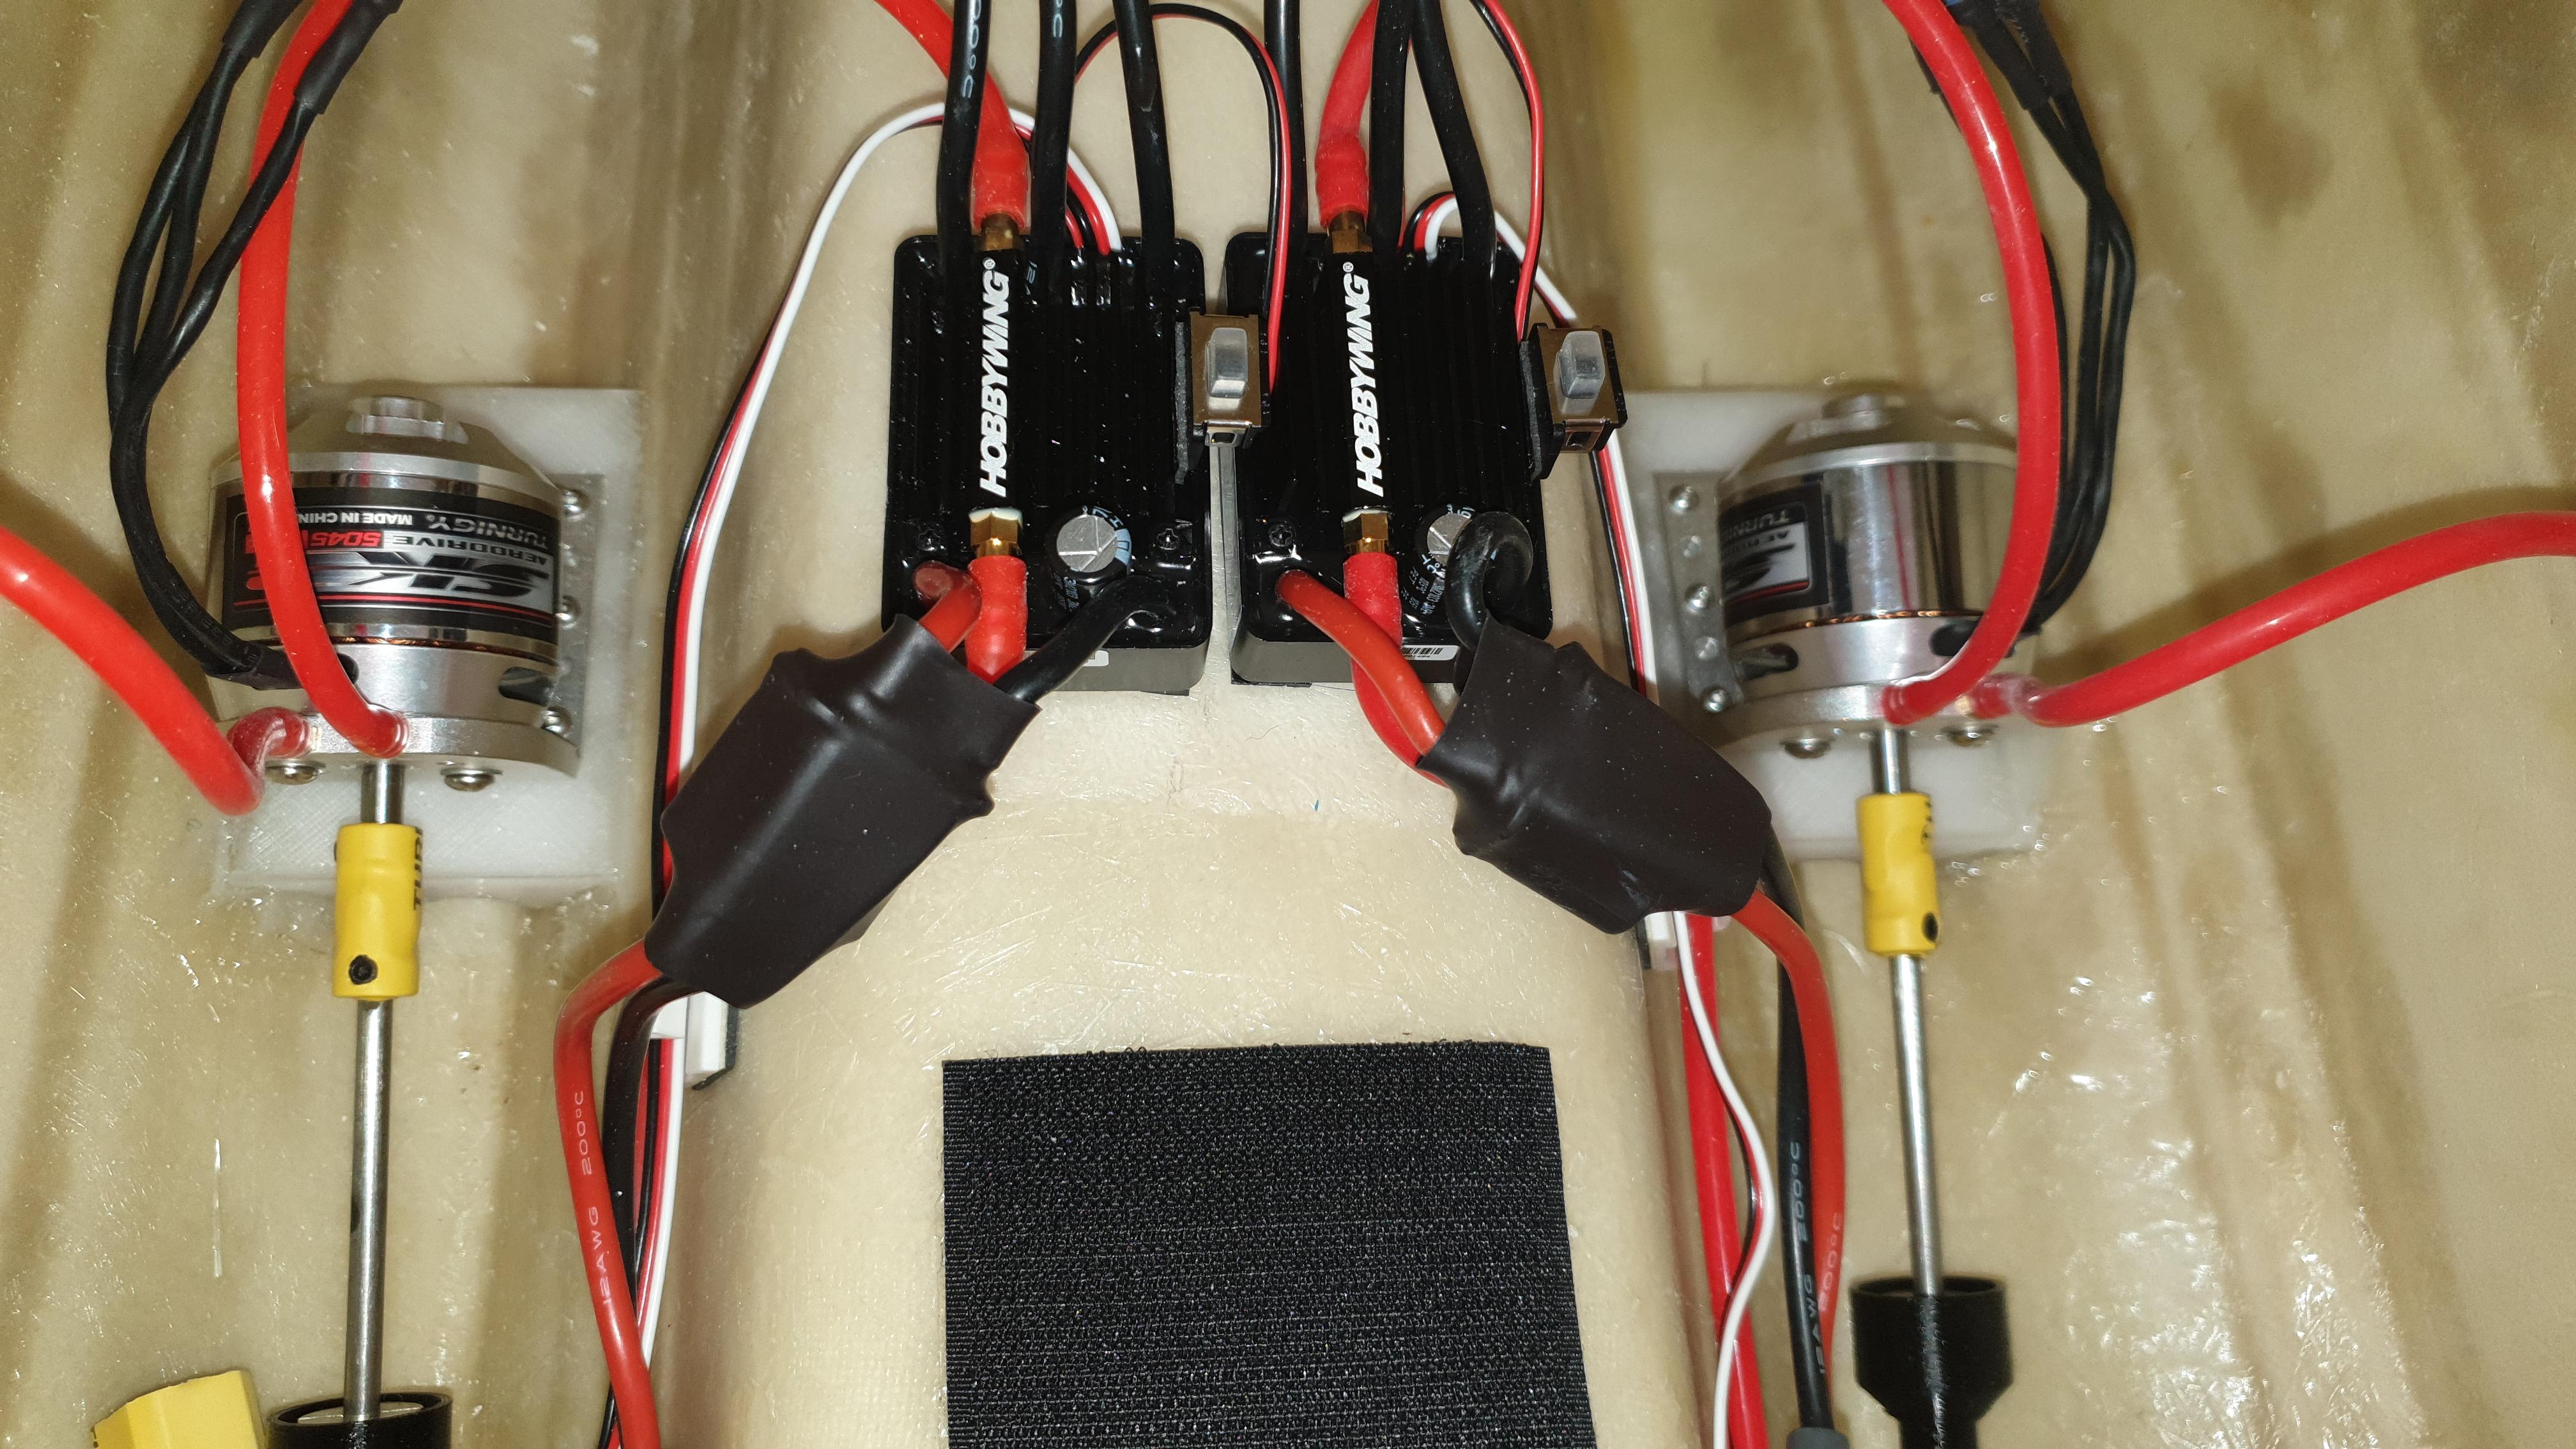
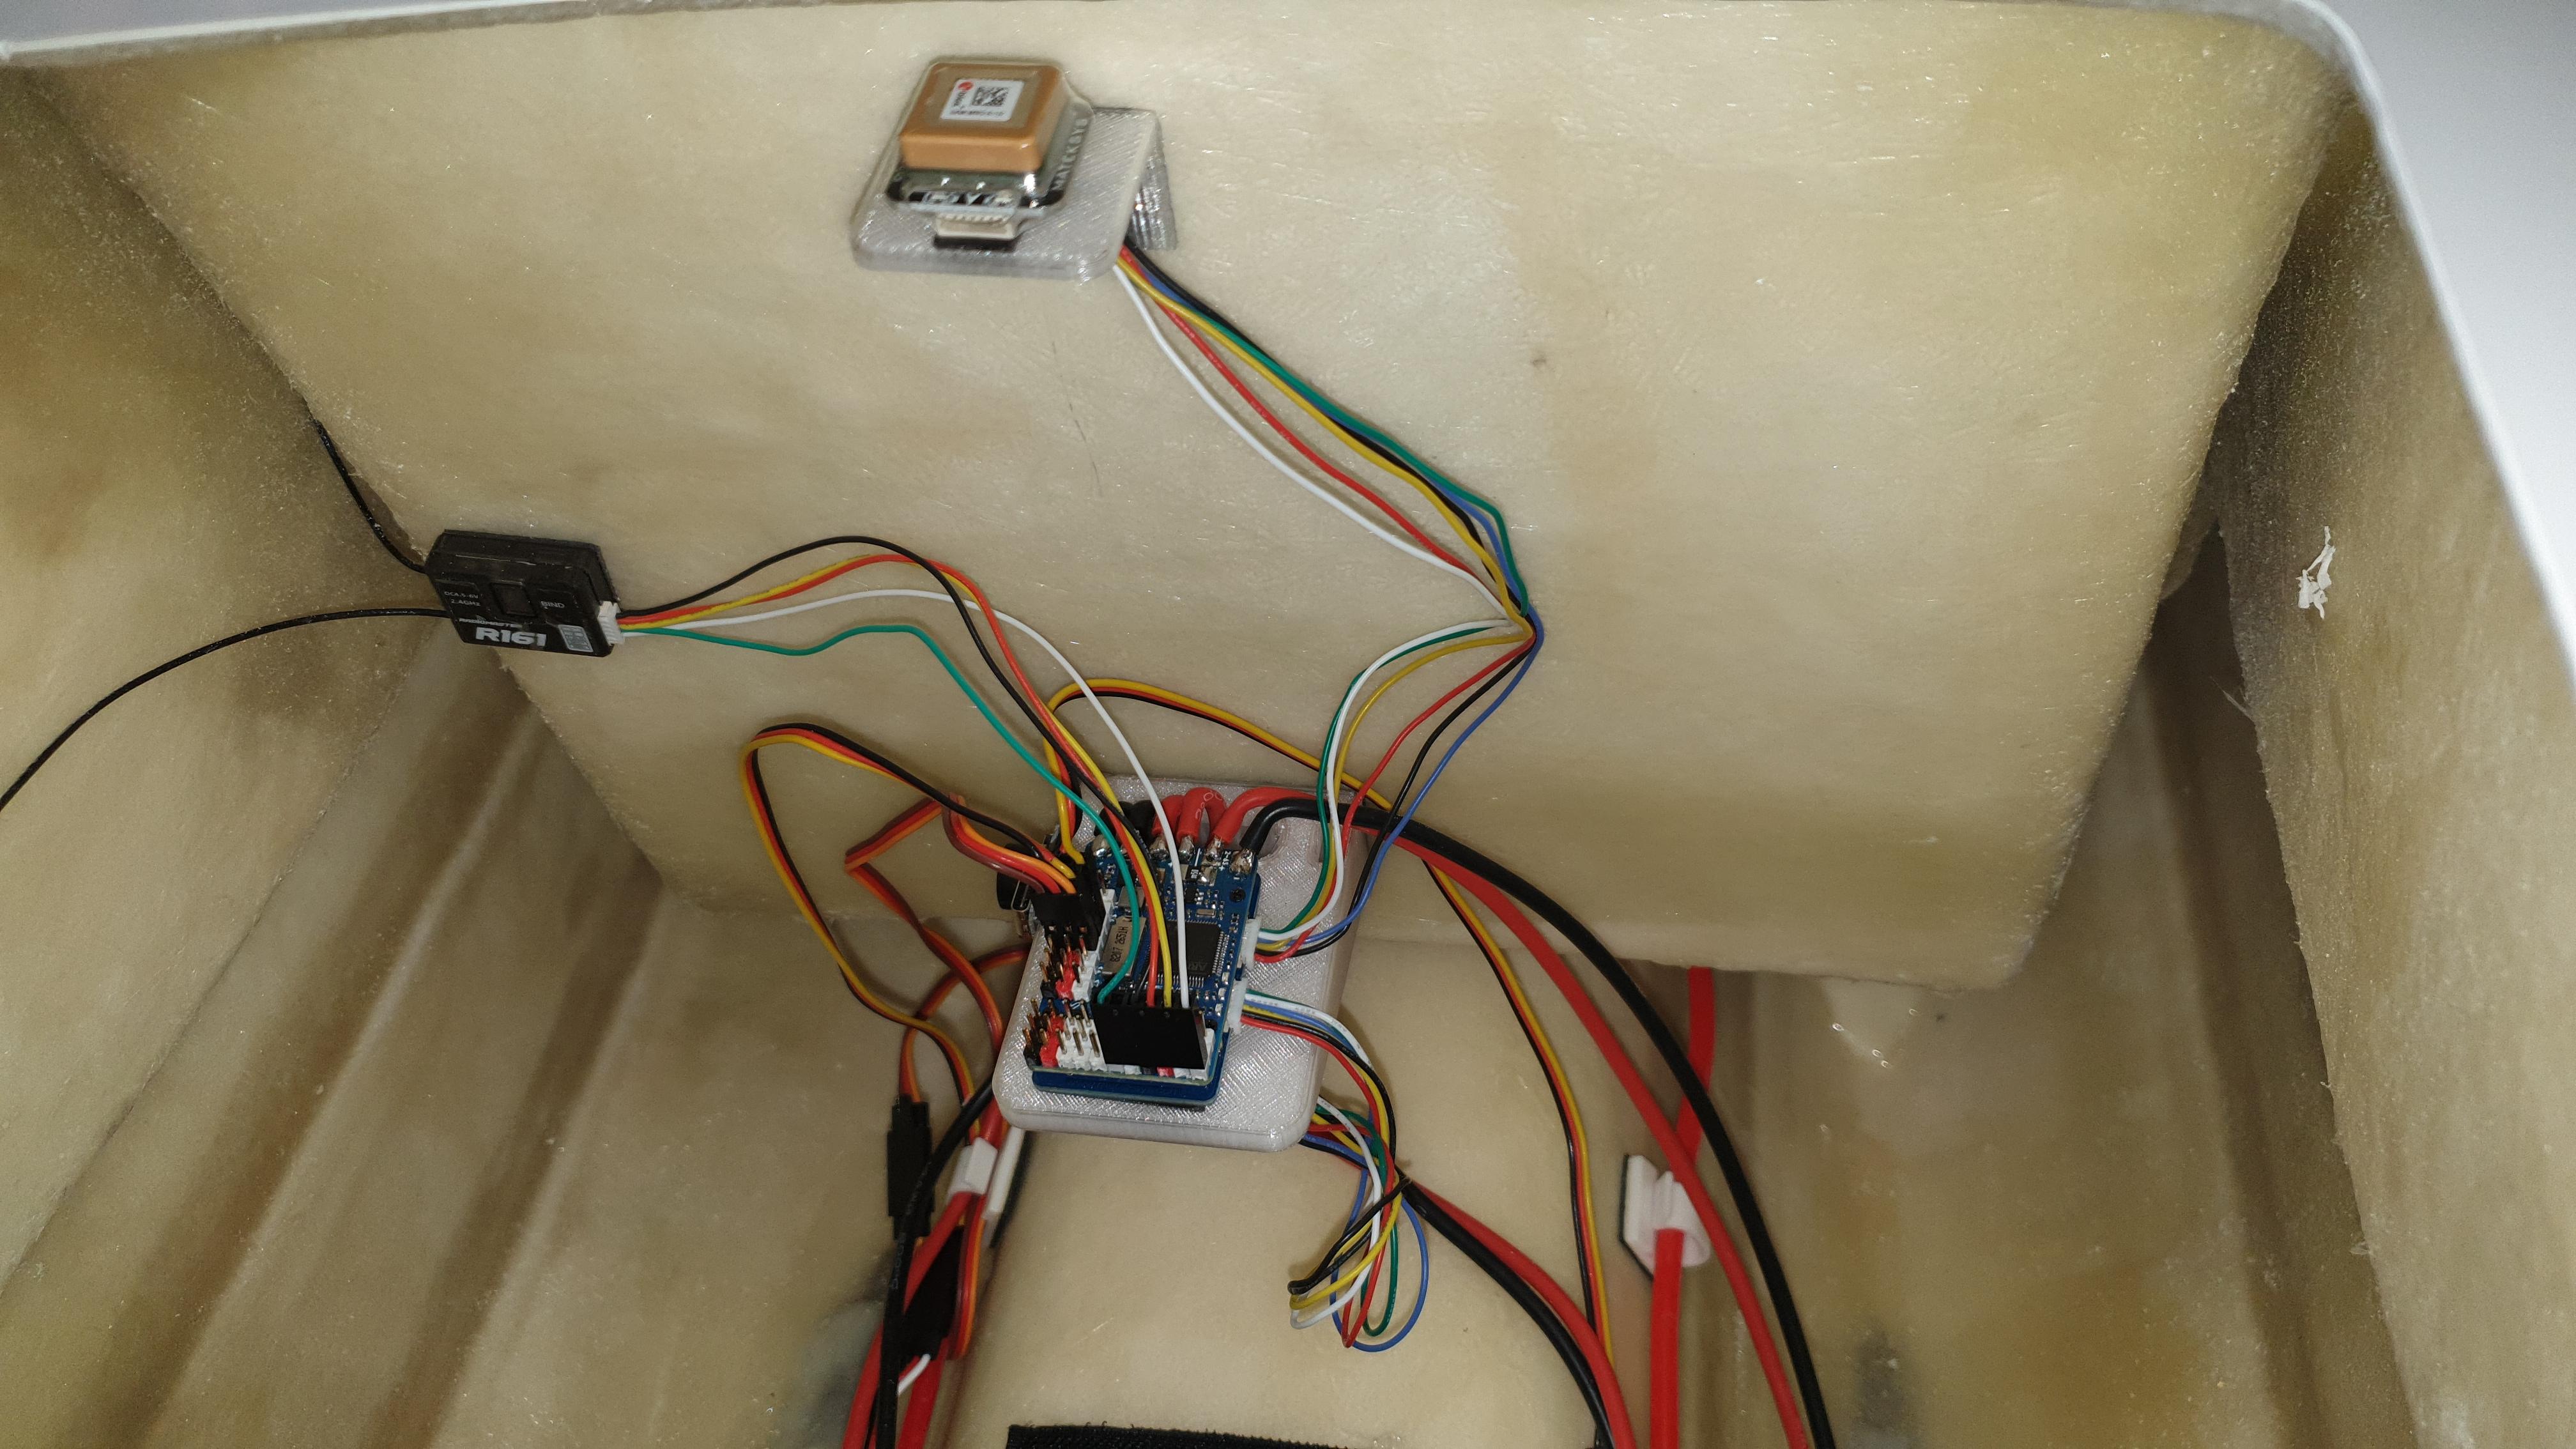
Rx, flight controller and GPS installed and programmed with INAV.
Just need some water to try it.
I agree, a great video by Kermit, a deserving winner of the 2021 GMA!
That looks interesting.
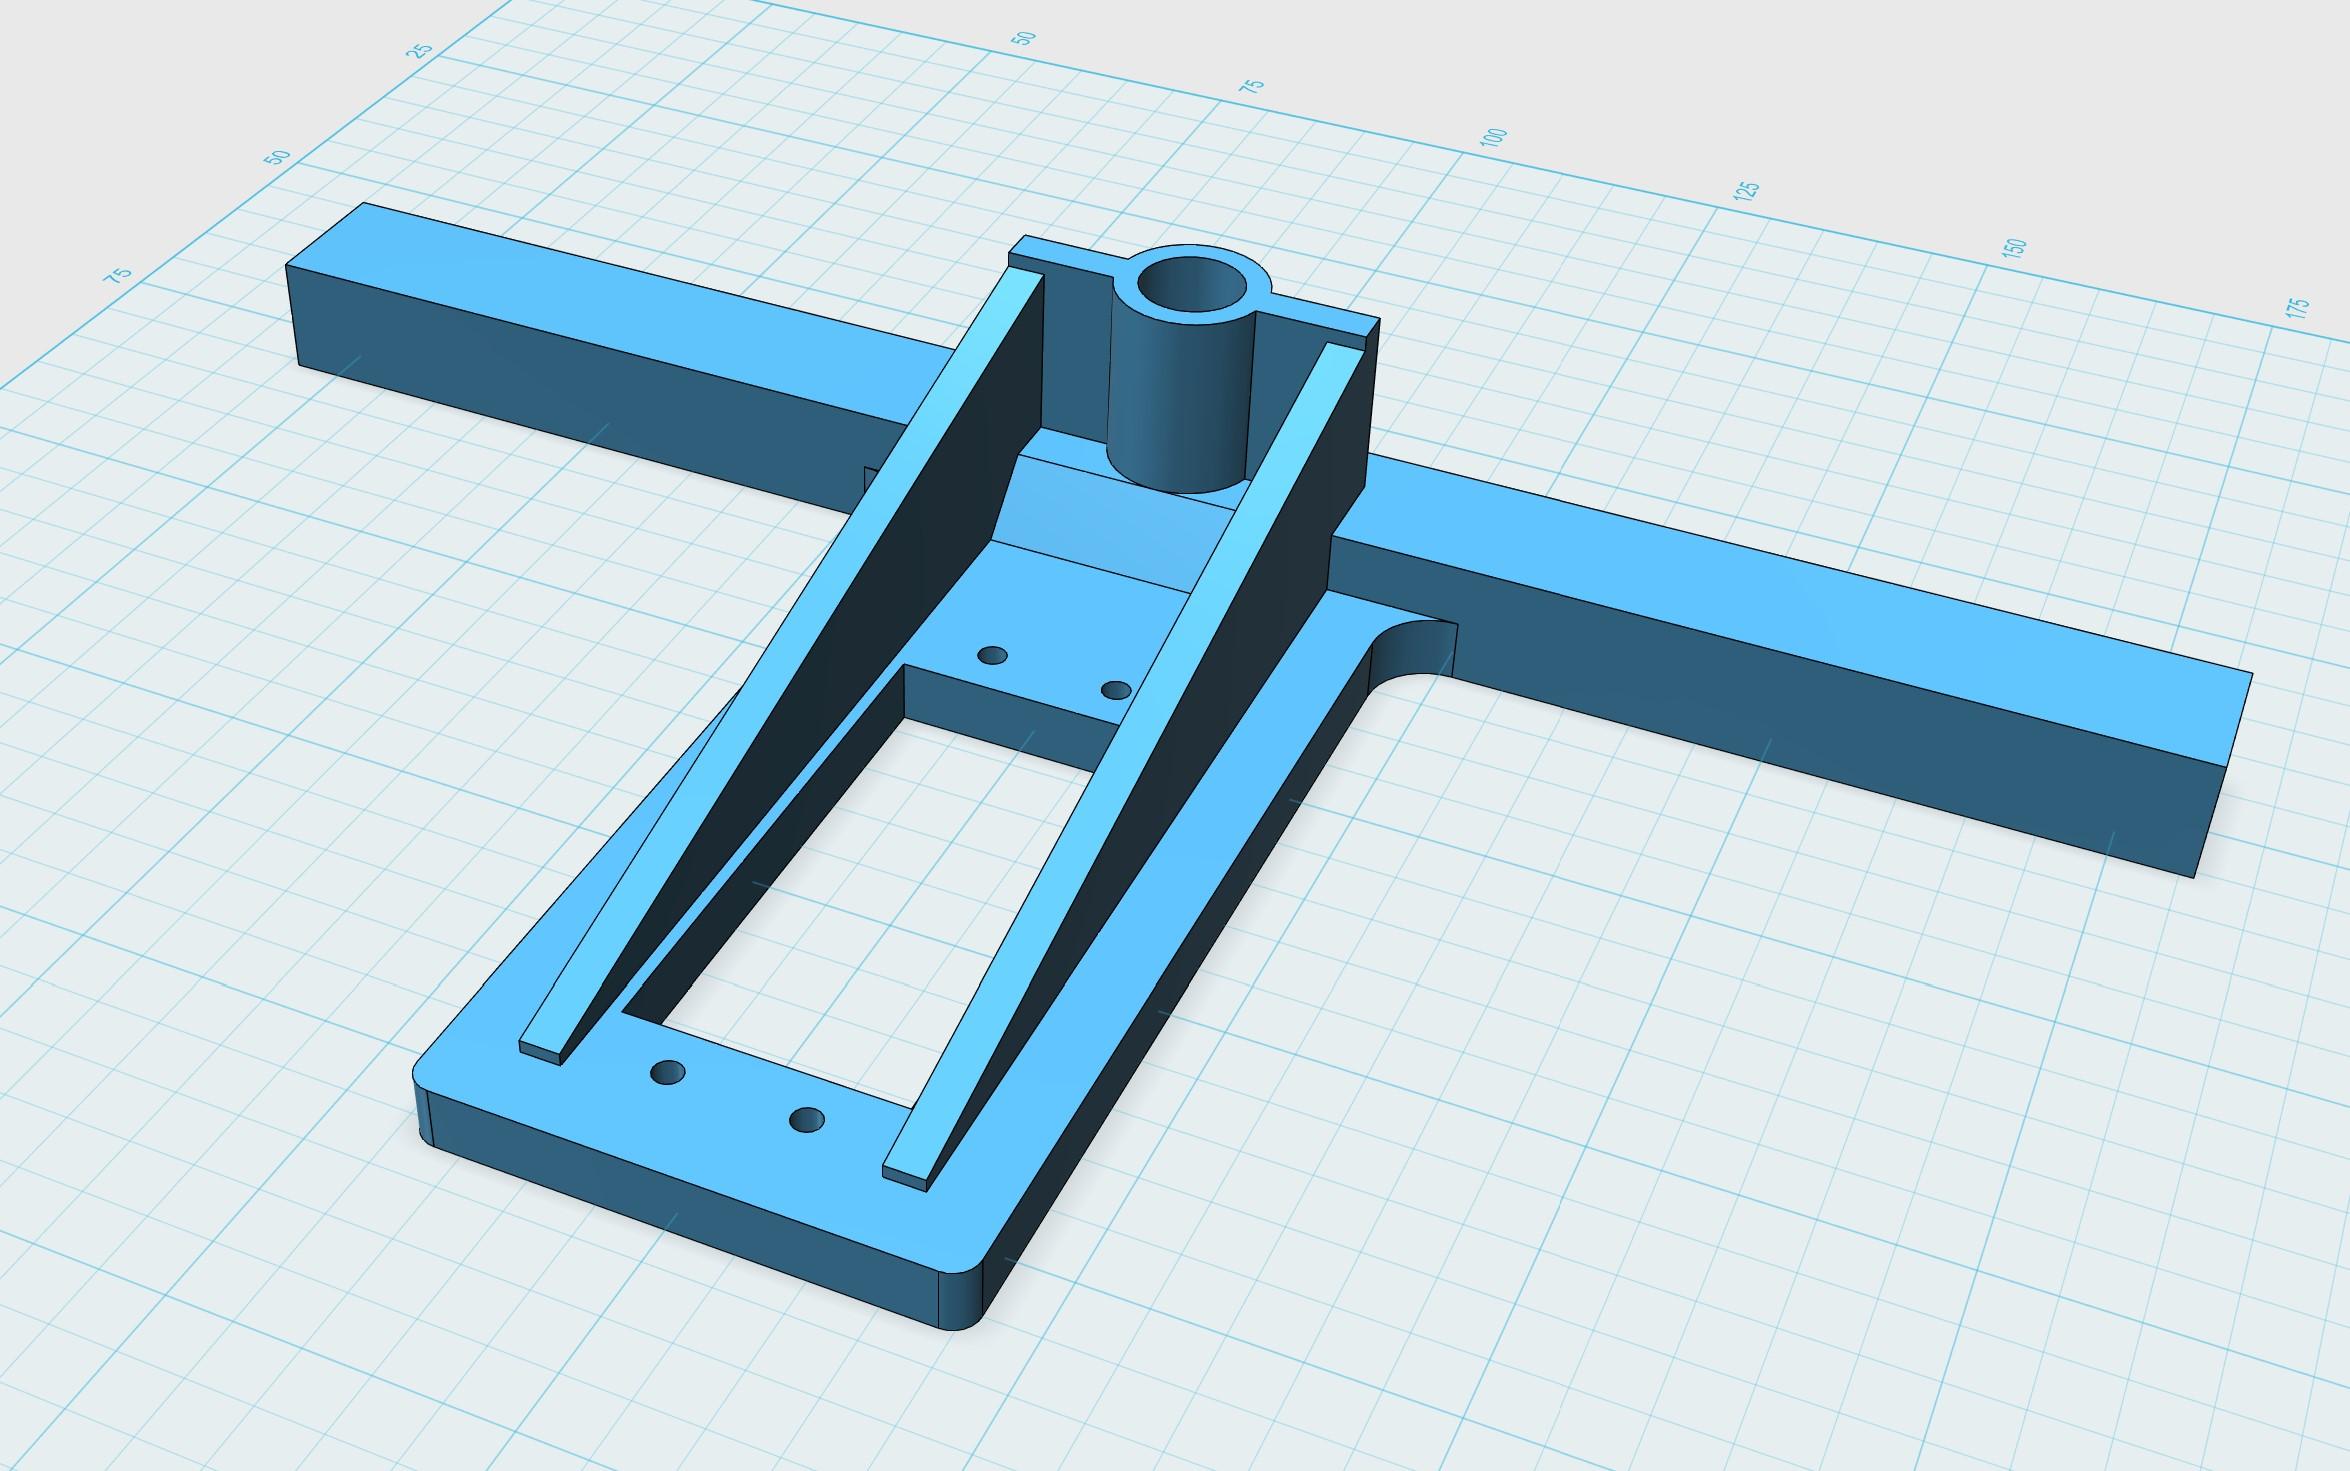
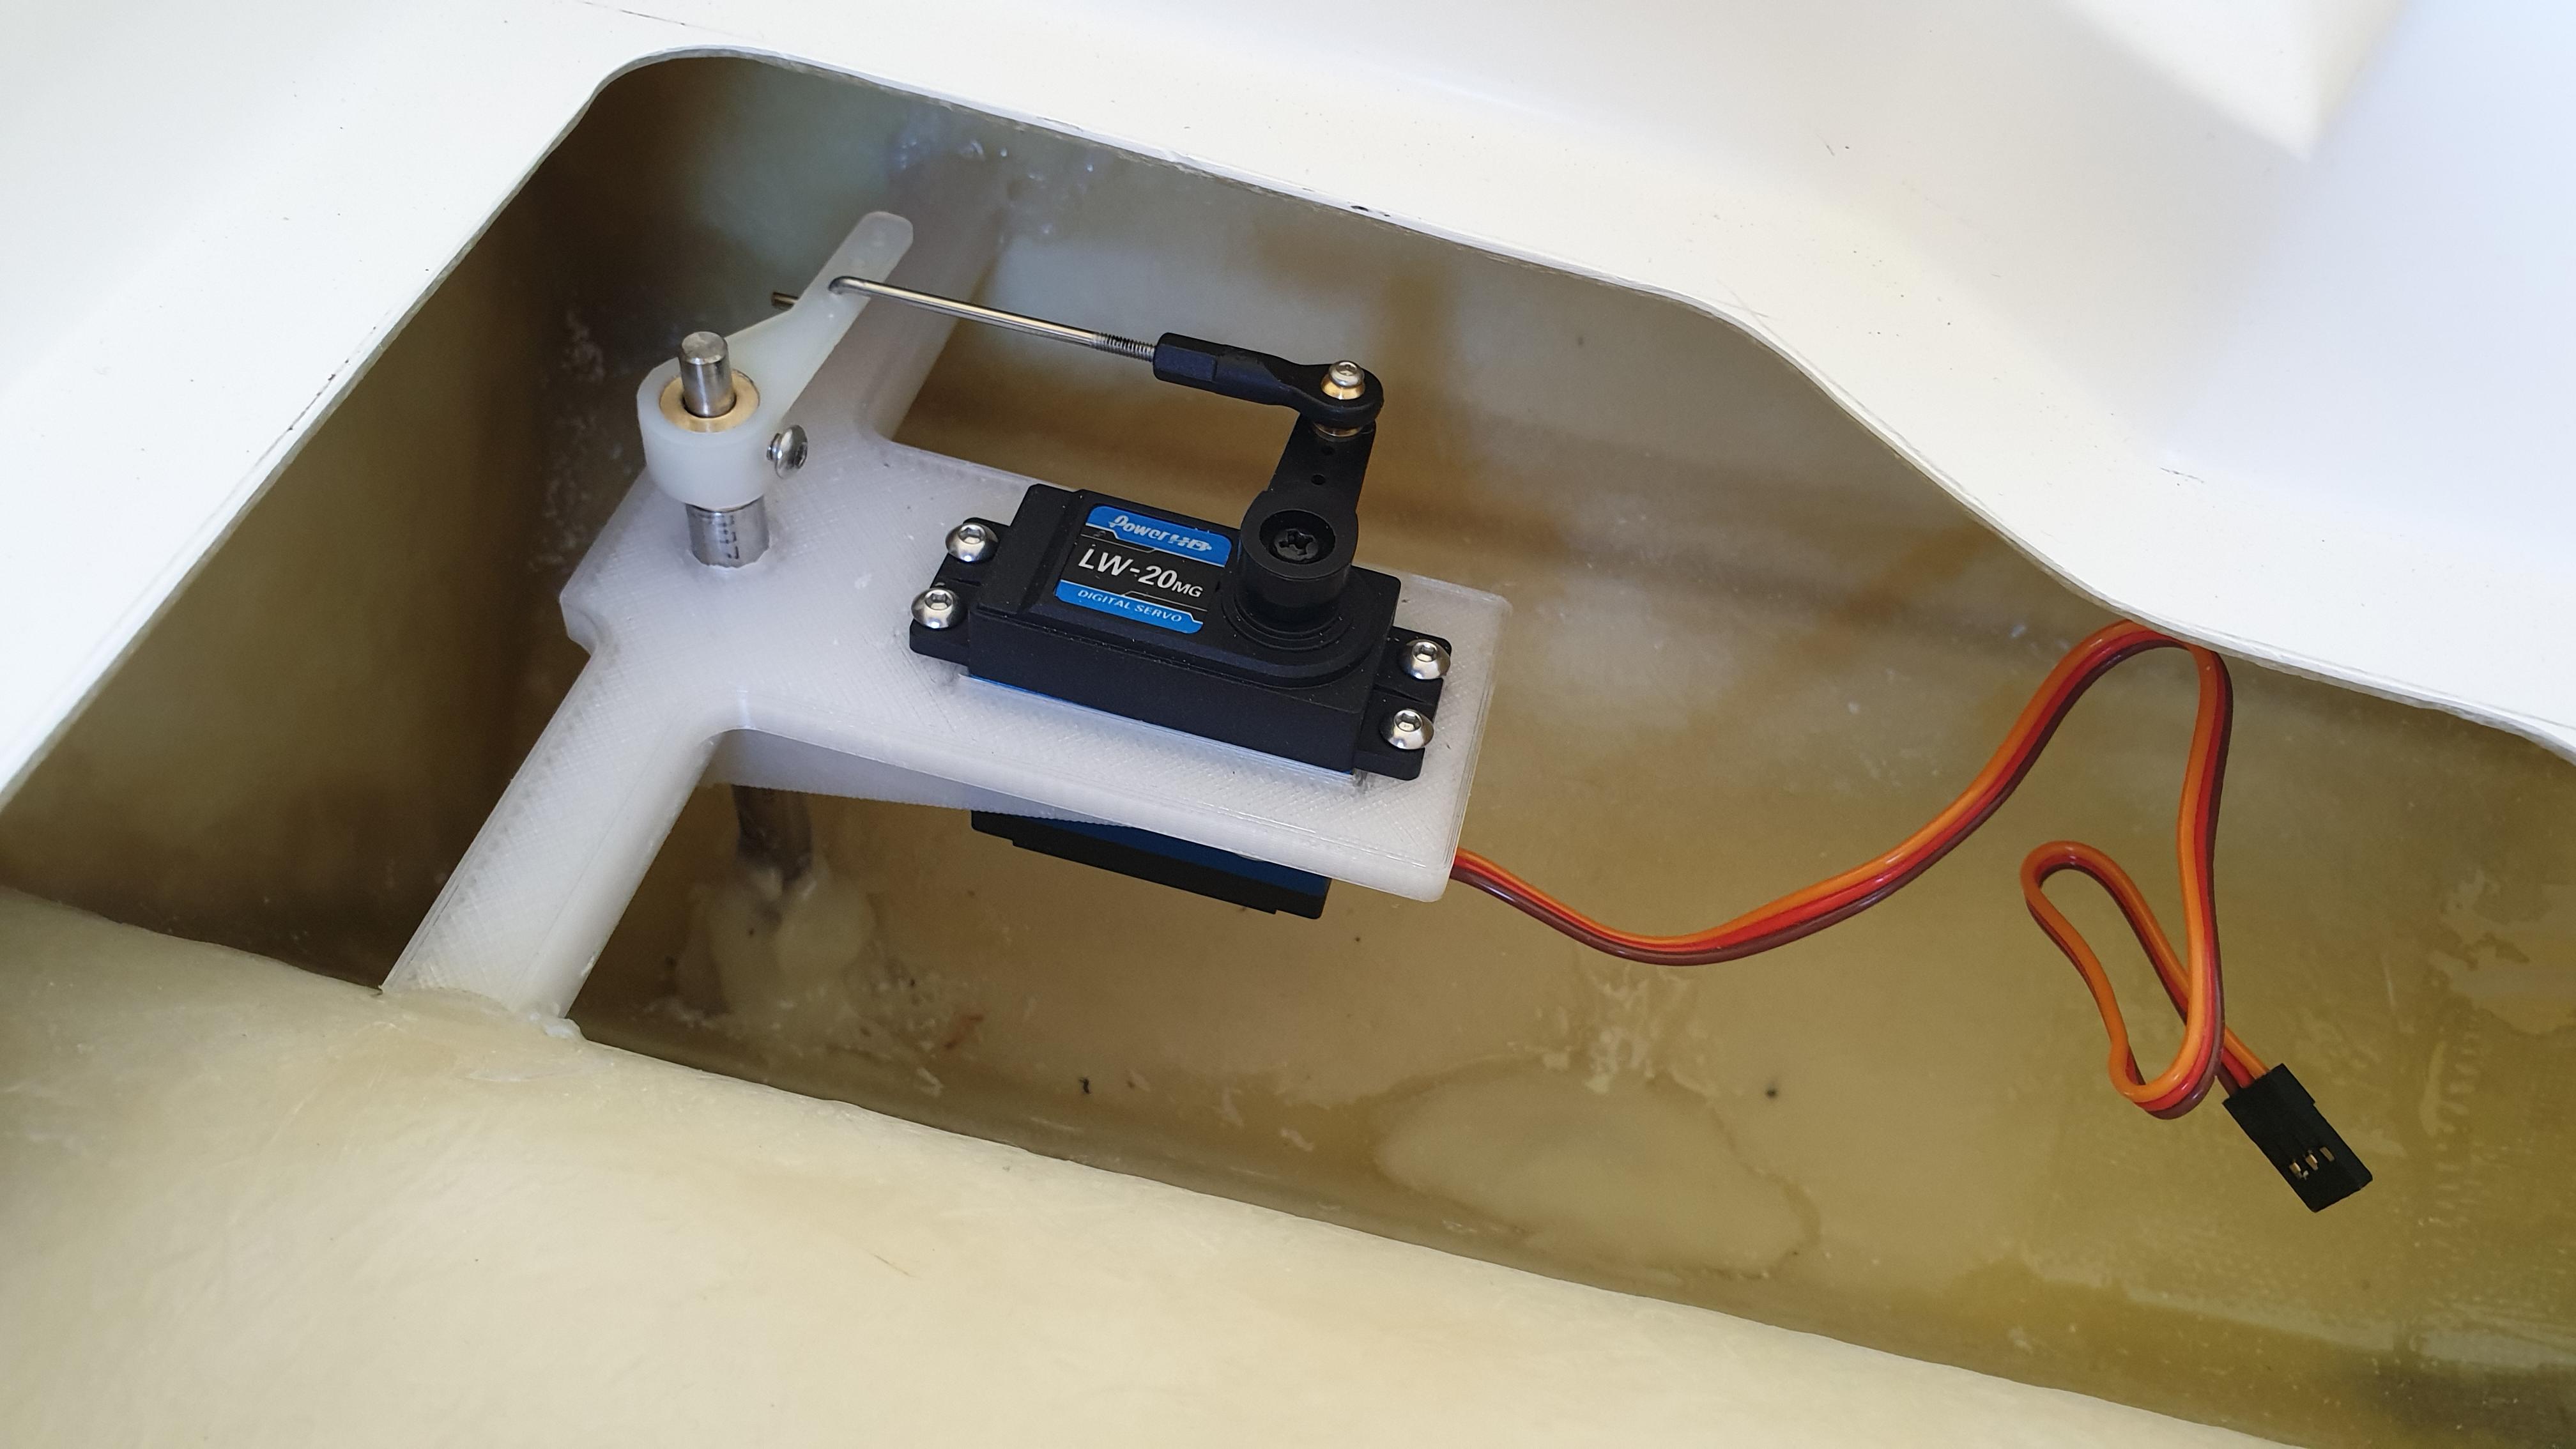
Installing the rudder servo’s
A couple more brackets were drawn up and 3D printed for mounting the rudder servo’s.
Glued into place, servo’s bolted down and hooked up the linkages,

Just got to throw in some electronic bits and pieces and she is ready for a sea trial.
Almost,
Just got to mount the rudder servo’s
Next Episode – Installing the motors,
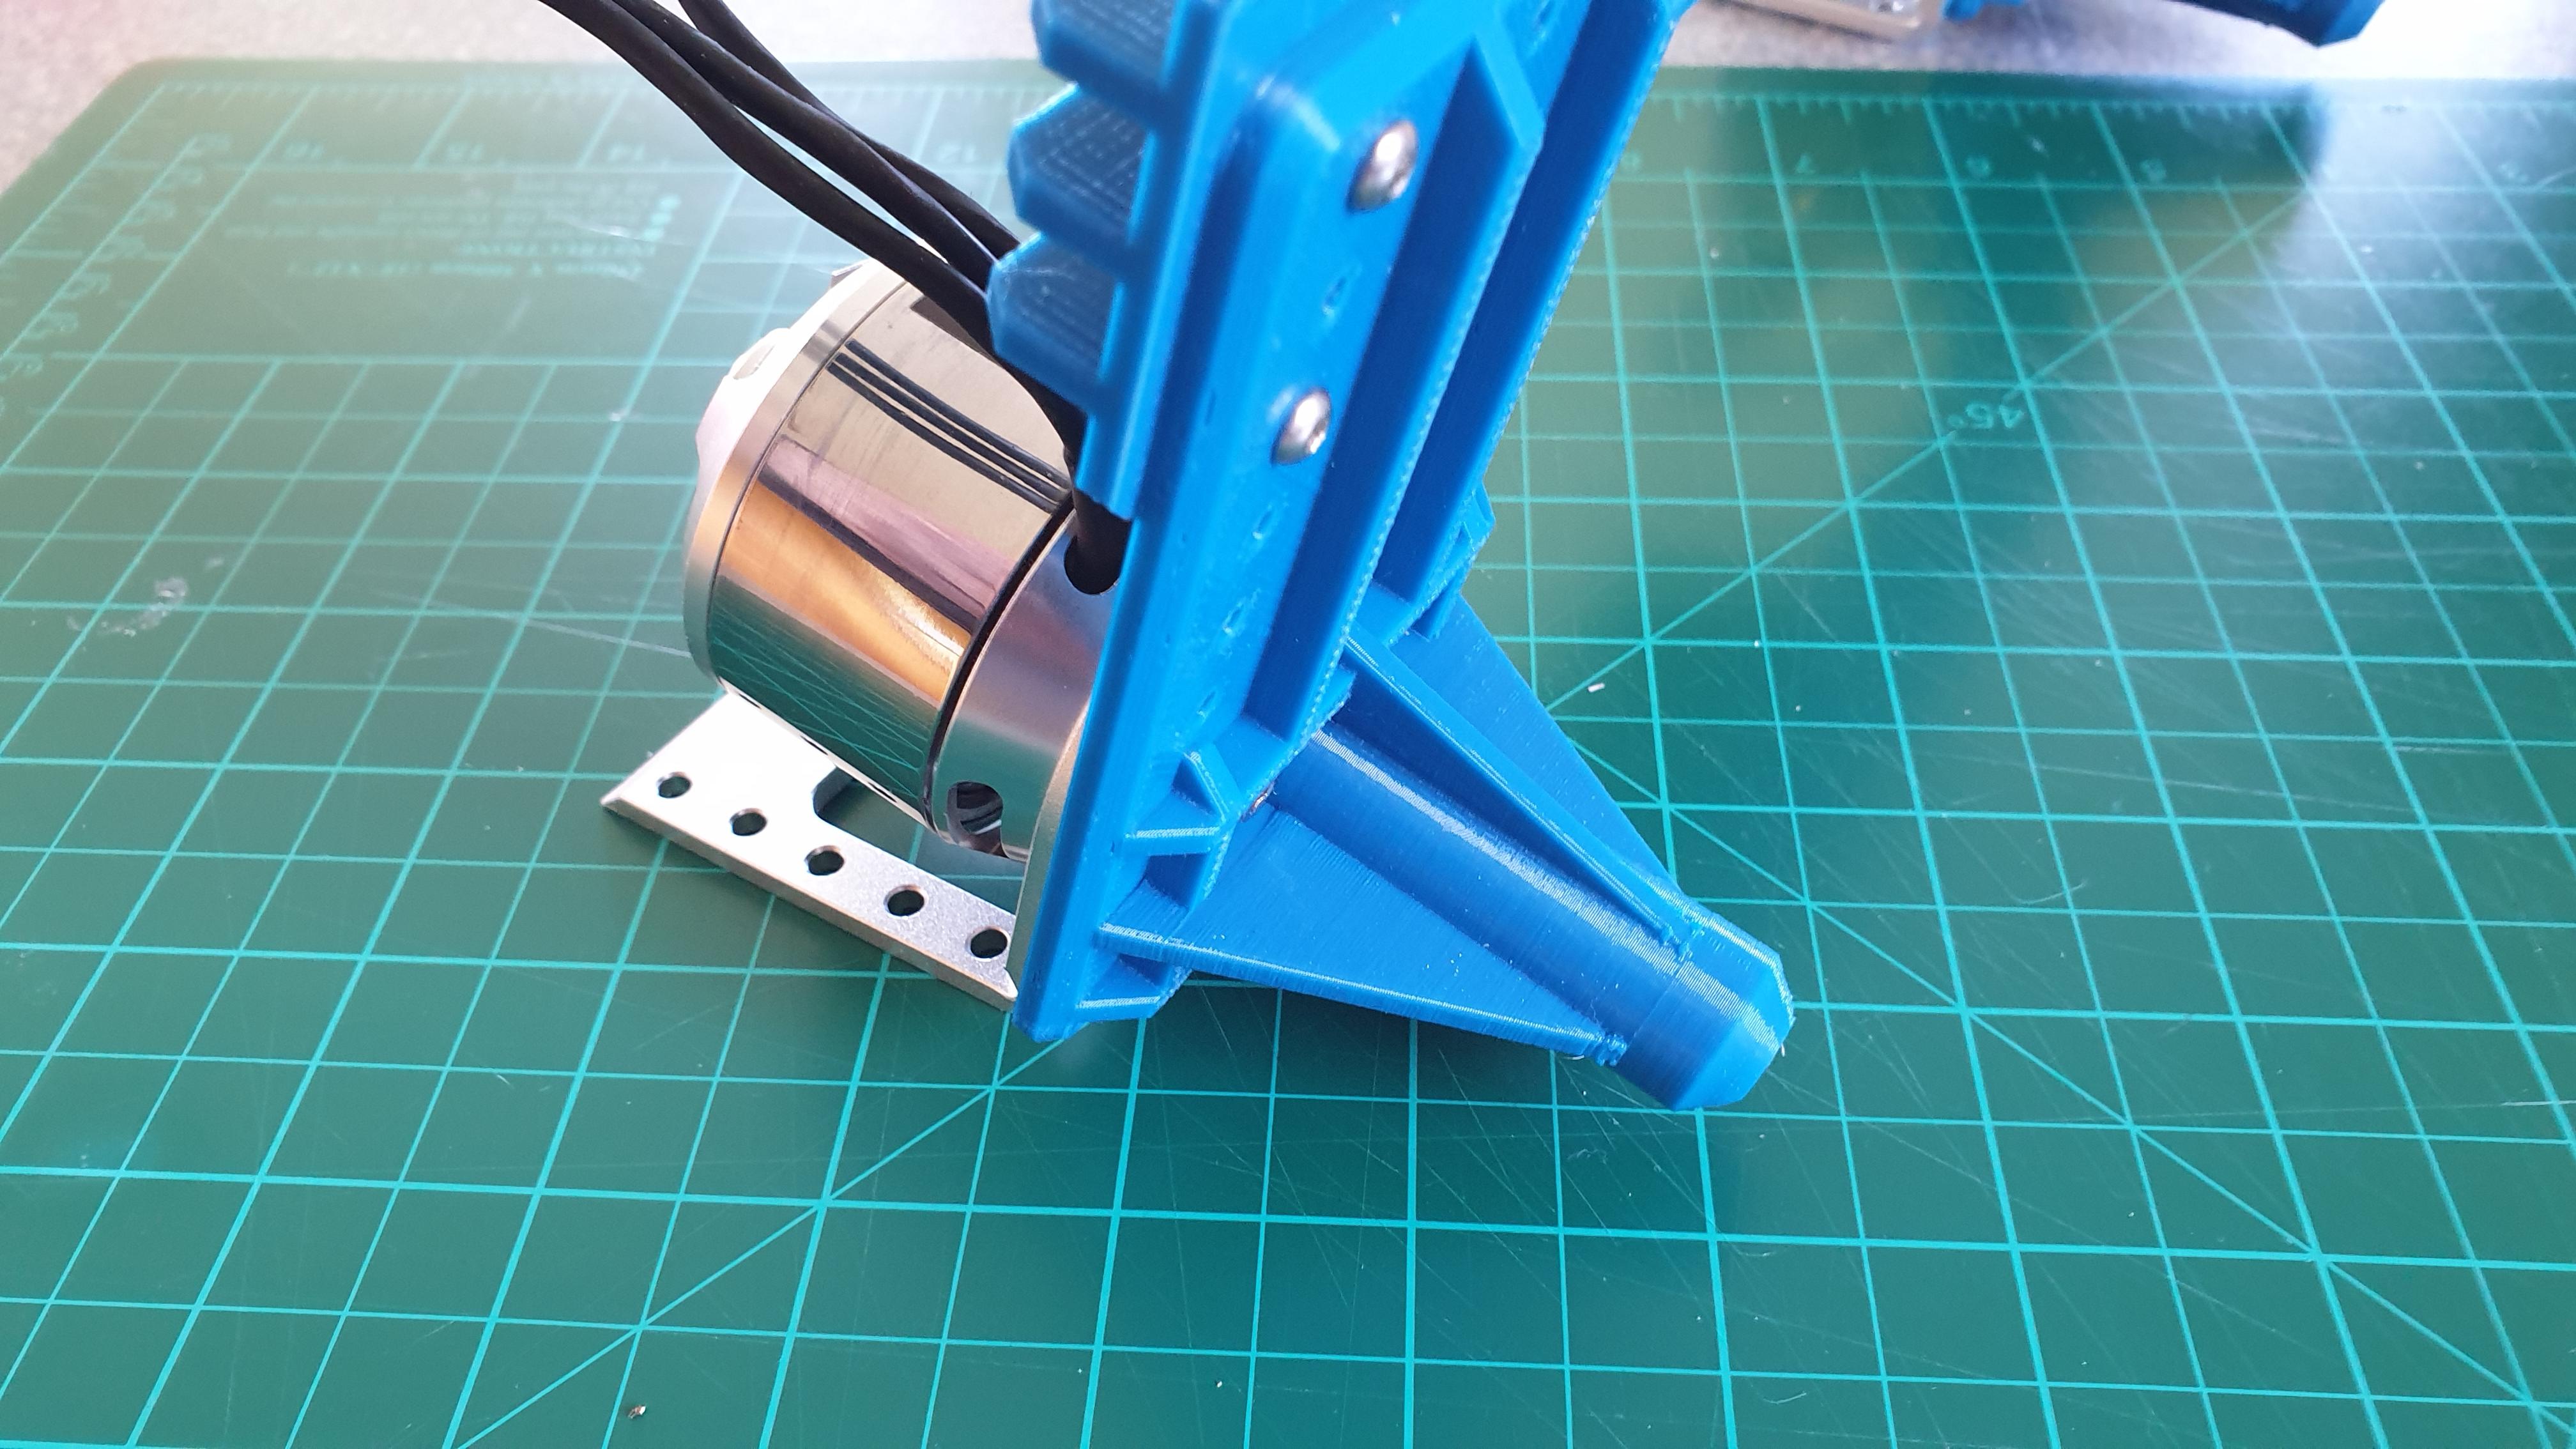
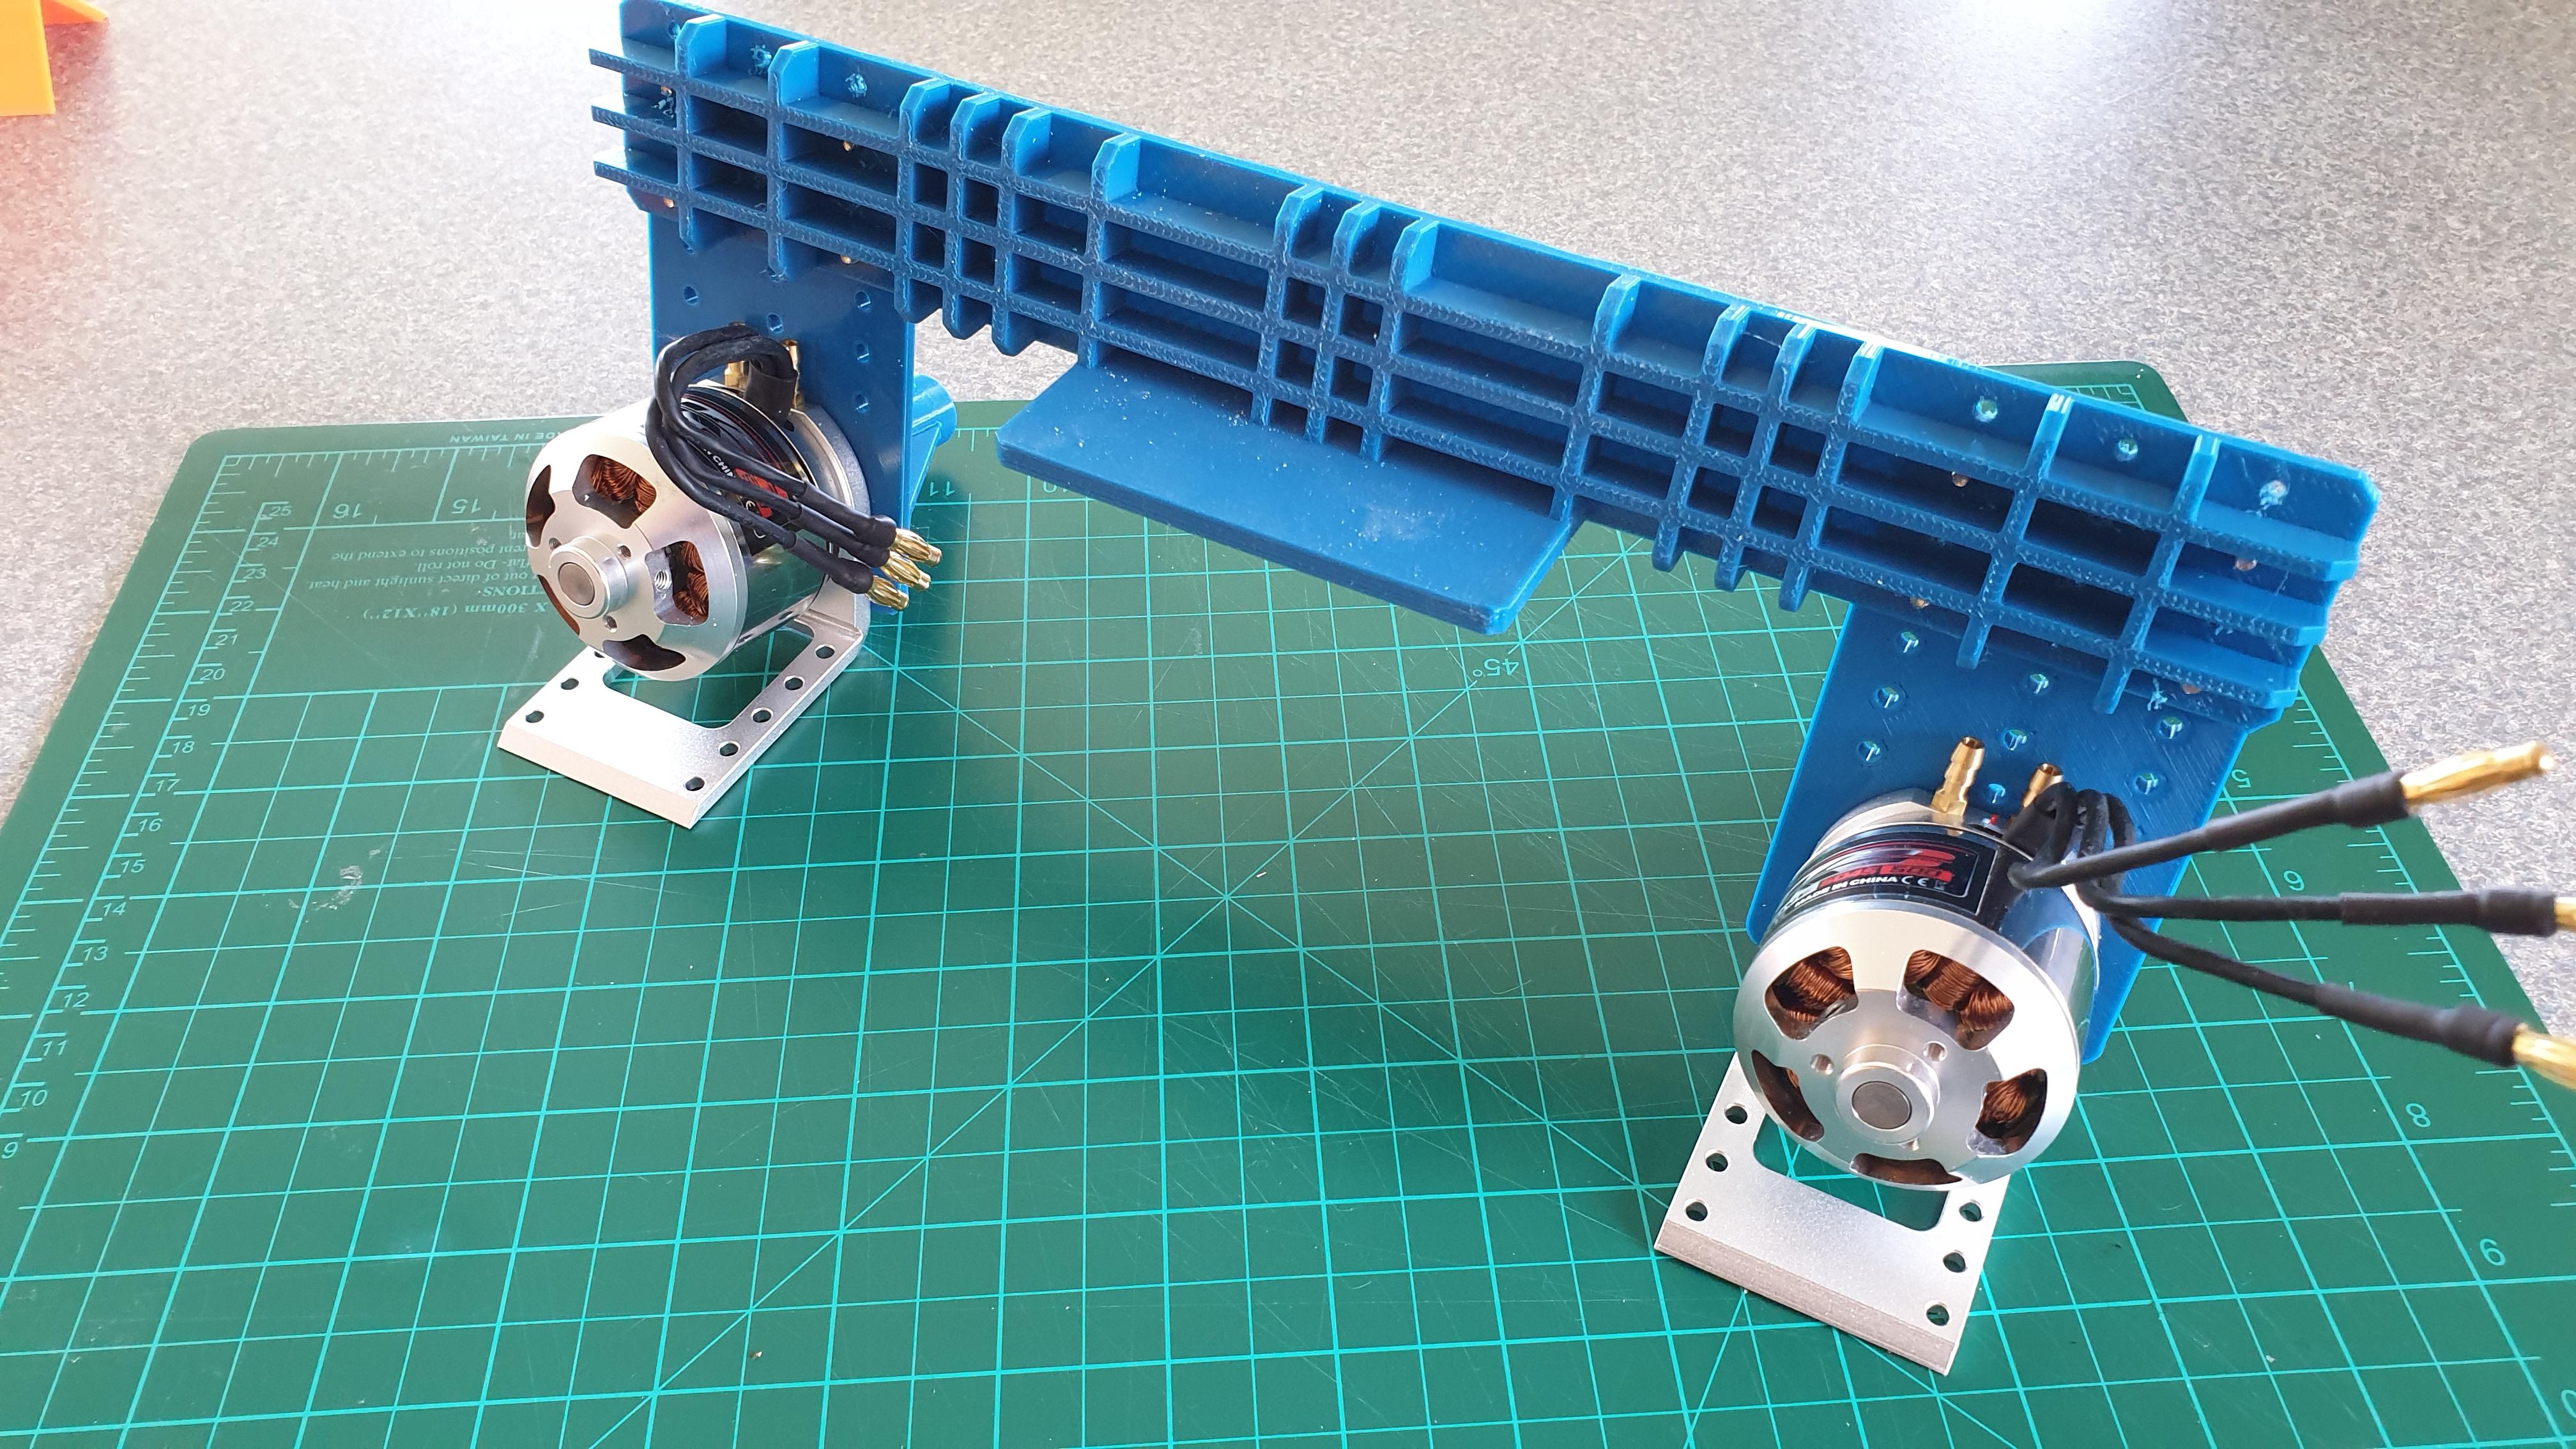
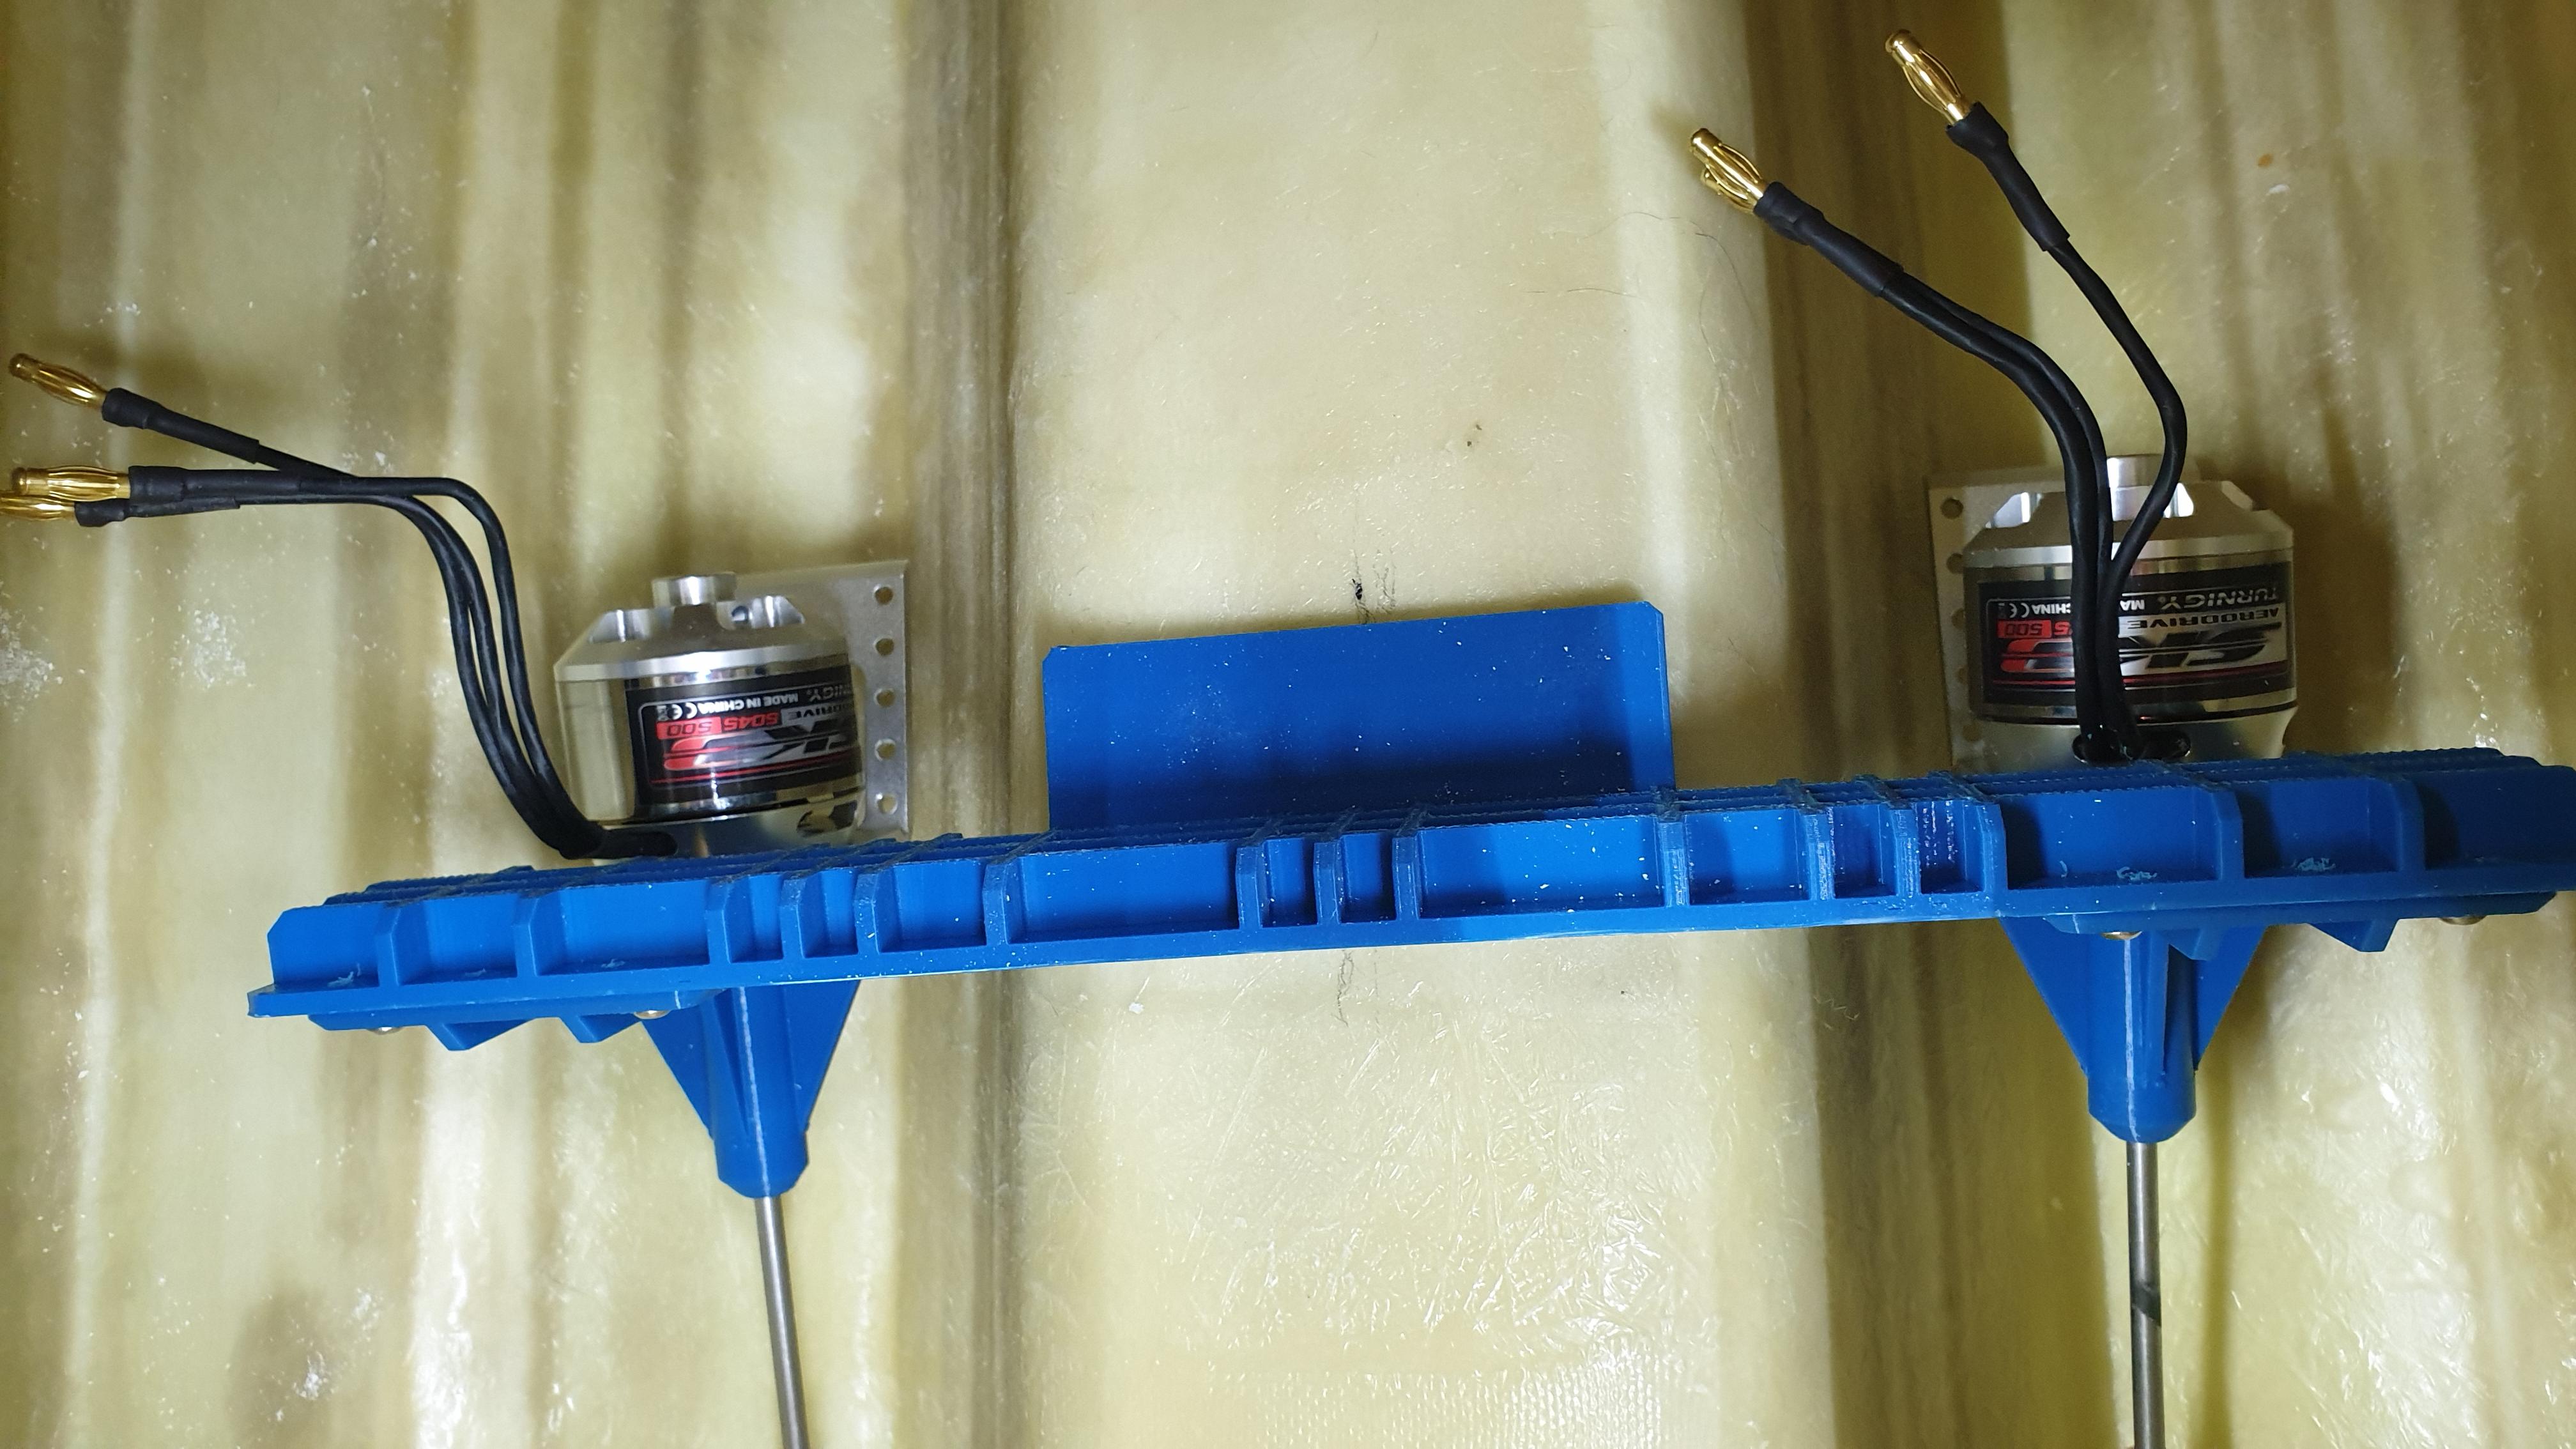
3d printed out the motor mounts in PETG and used some 3 mm brass threaded inserts for screwing the motors down.
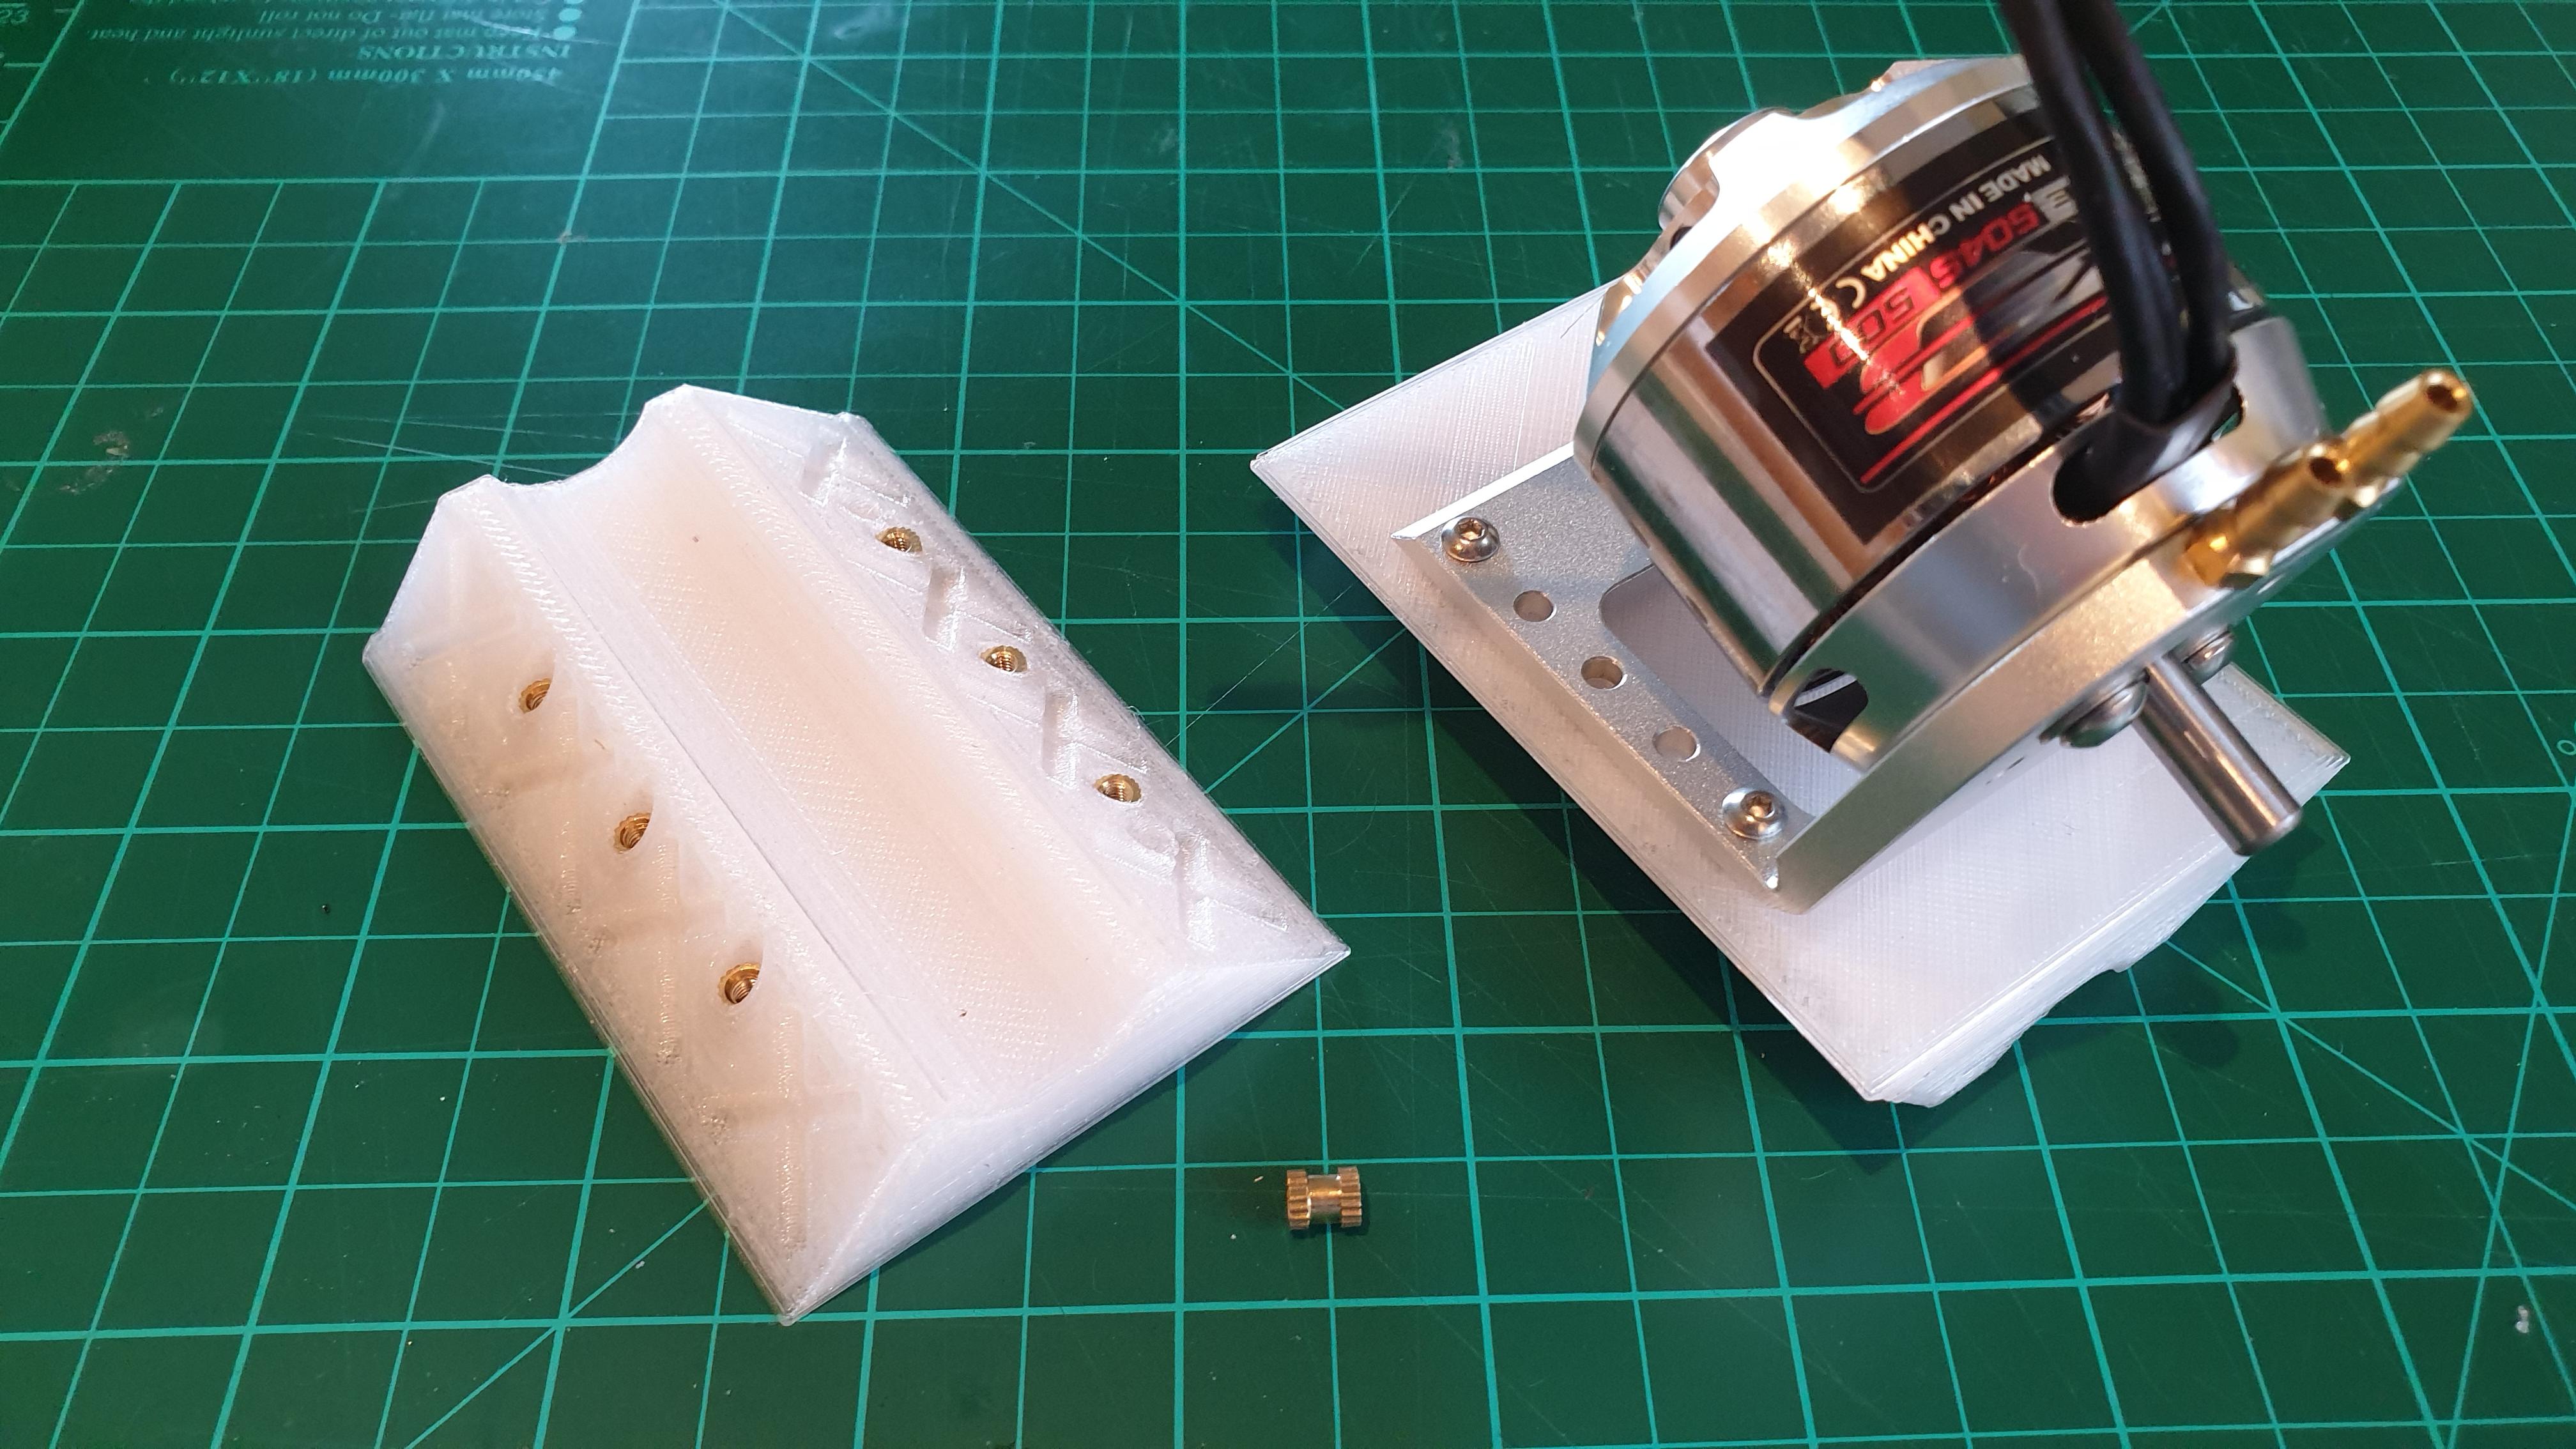
The mounts were then fixed in place using the 3d printed motor jigs, with epoxy resin thickened with microballons.
The prop shafts were cut to the right lengths. Flats were filed onto both the motor and prop shafts, and everything installed.
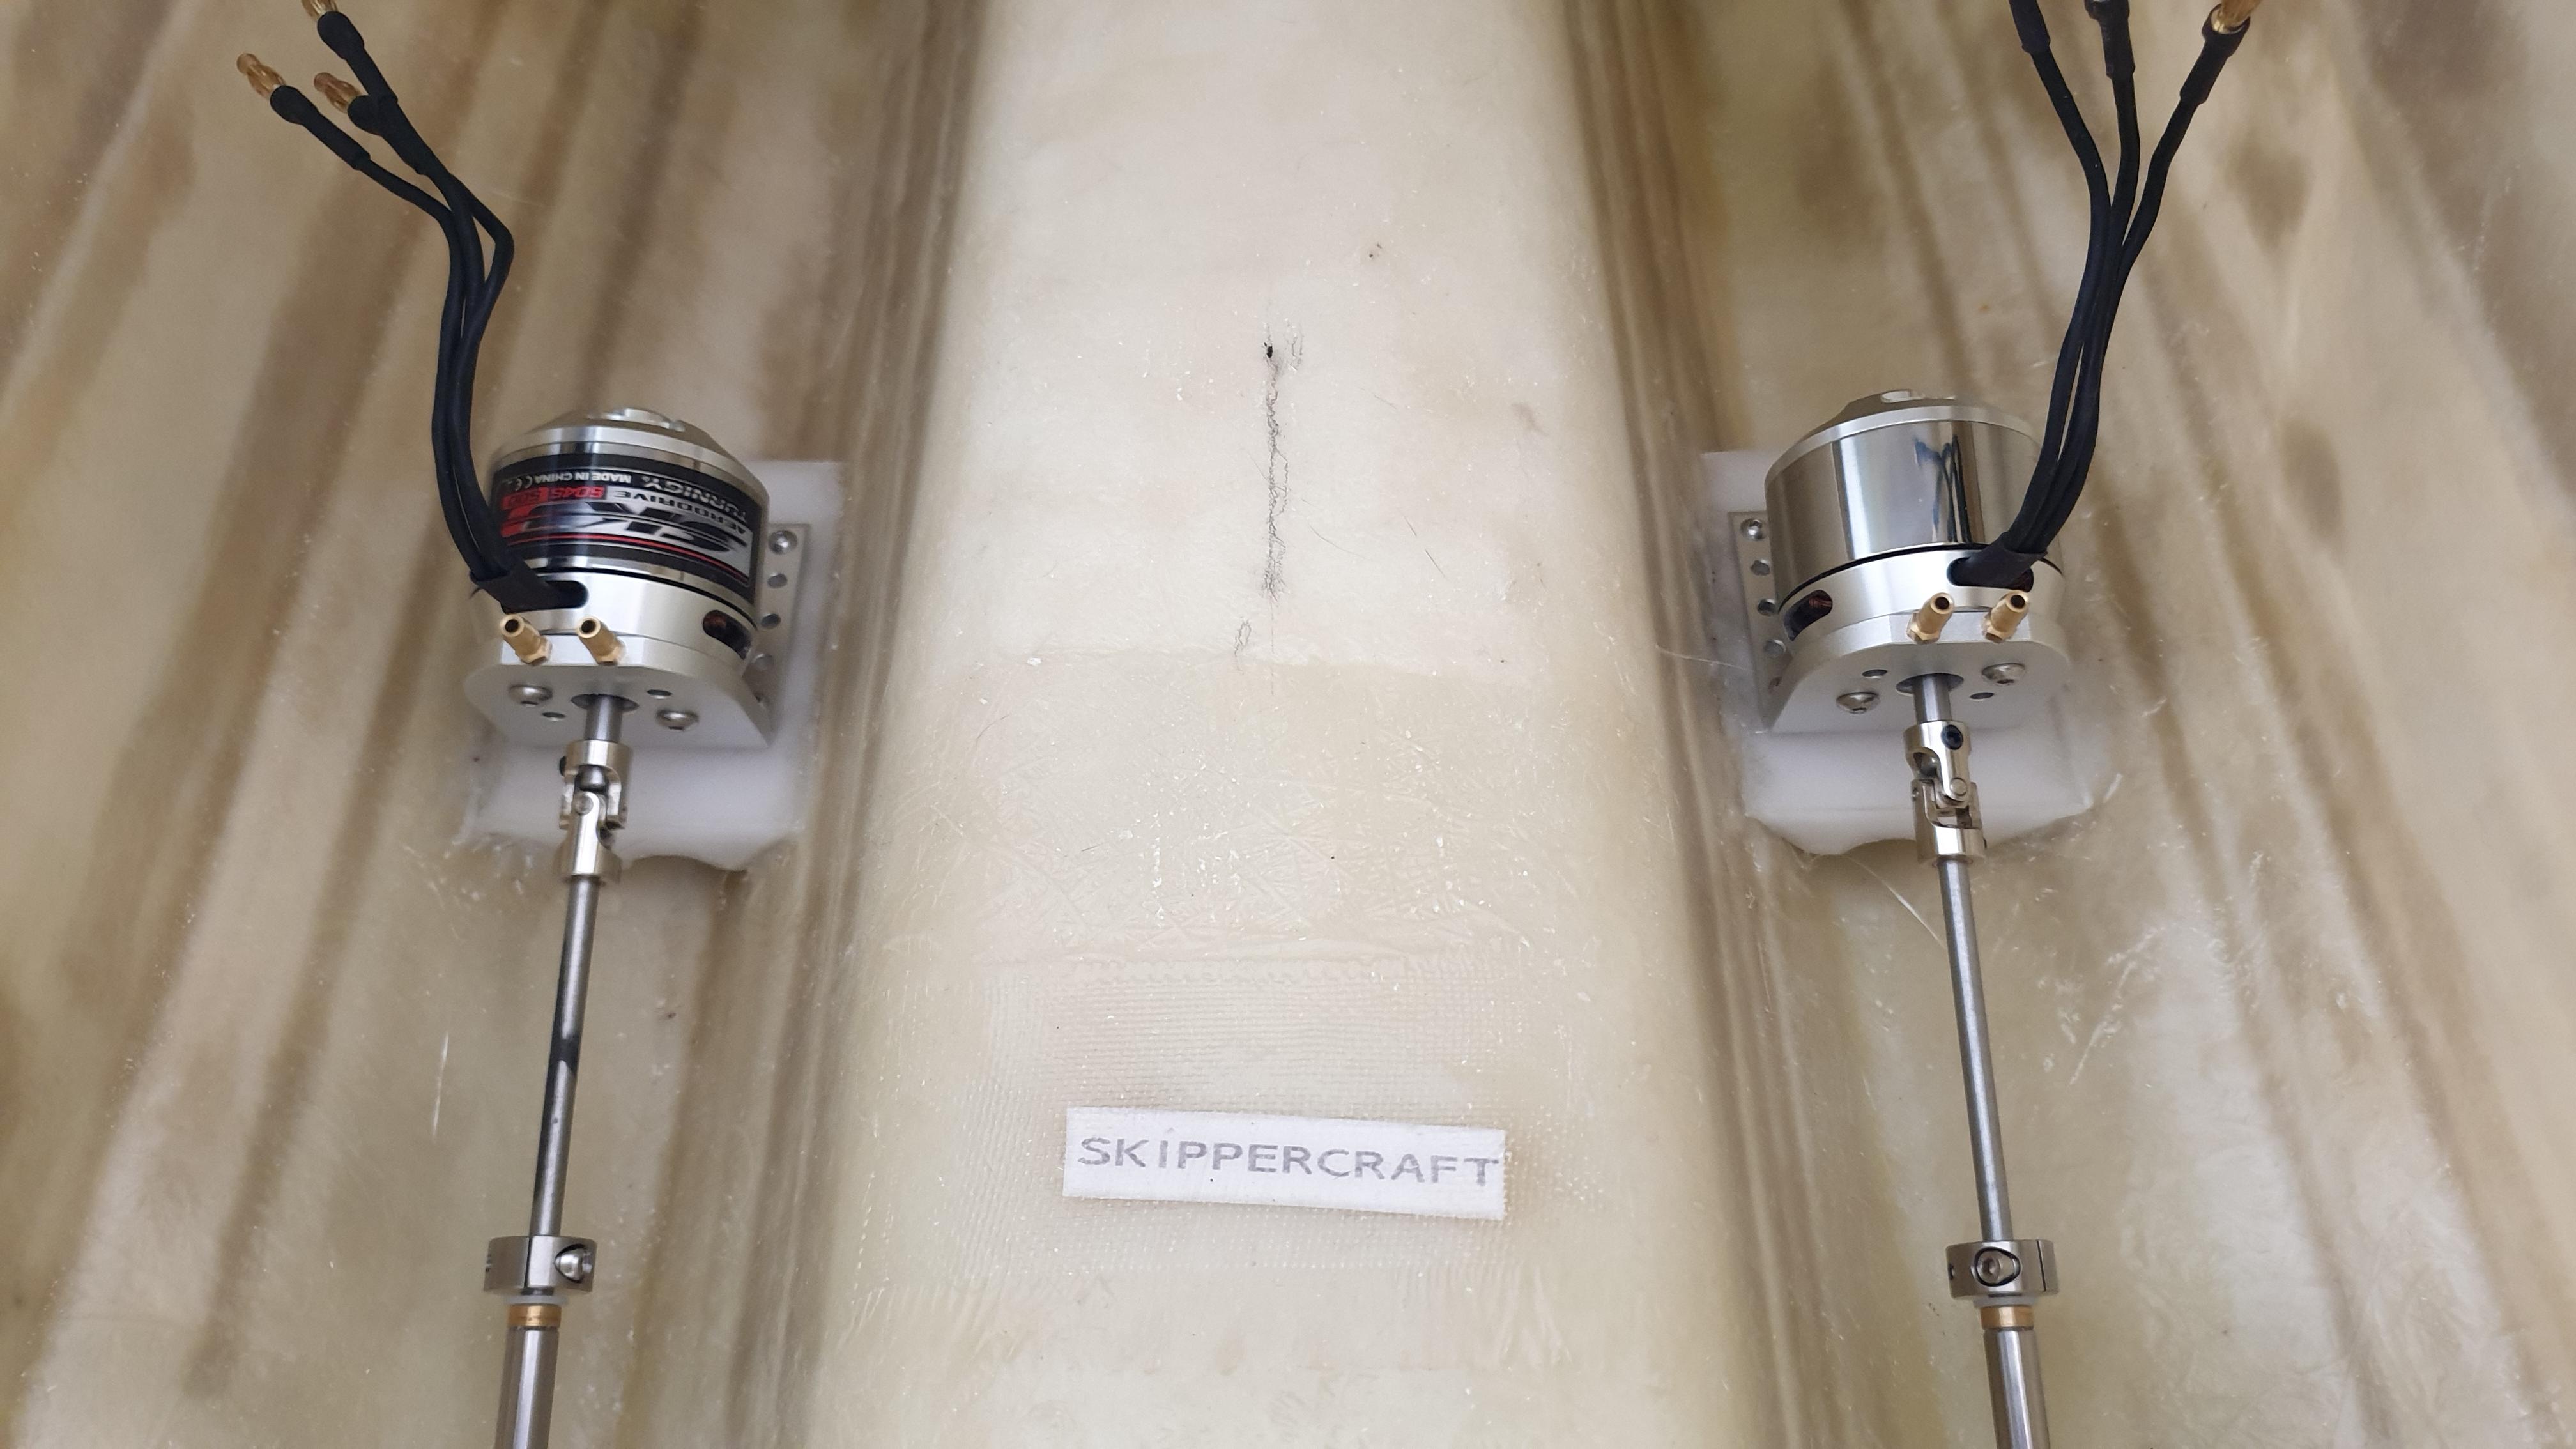
The prop shafts lined up perfectly with the motors
The view from the outside,
Thanks, Kermit.
I will remind all the “Marine Modellers of Tasmania” to keep their wheels well lubricated.
Great video’s, Merry Christmas to all!
Great video Kermit, I like the slo-mo’s
Have you been getting video lessons off Moose as well?
Nice video Kermit, well done. I think your video quality has improved after washing your camera.
P.S. The flying lessons you got of Moose certainly paid off.
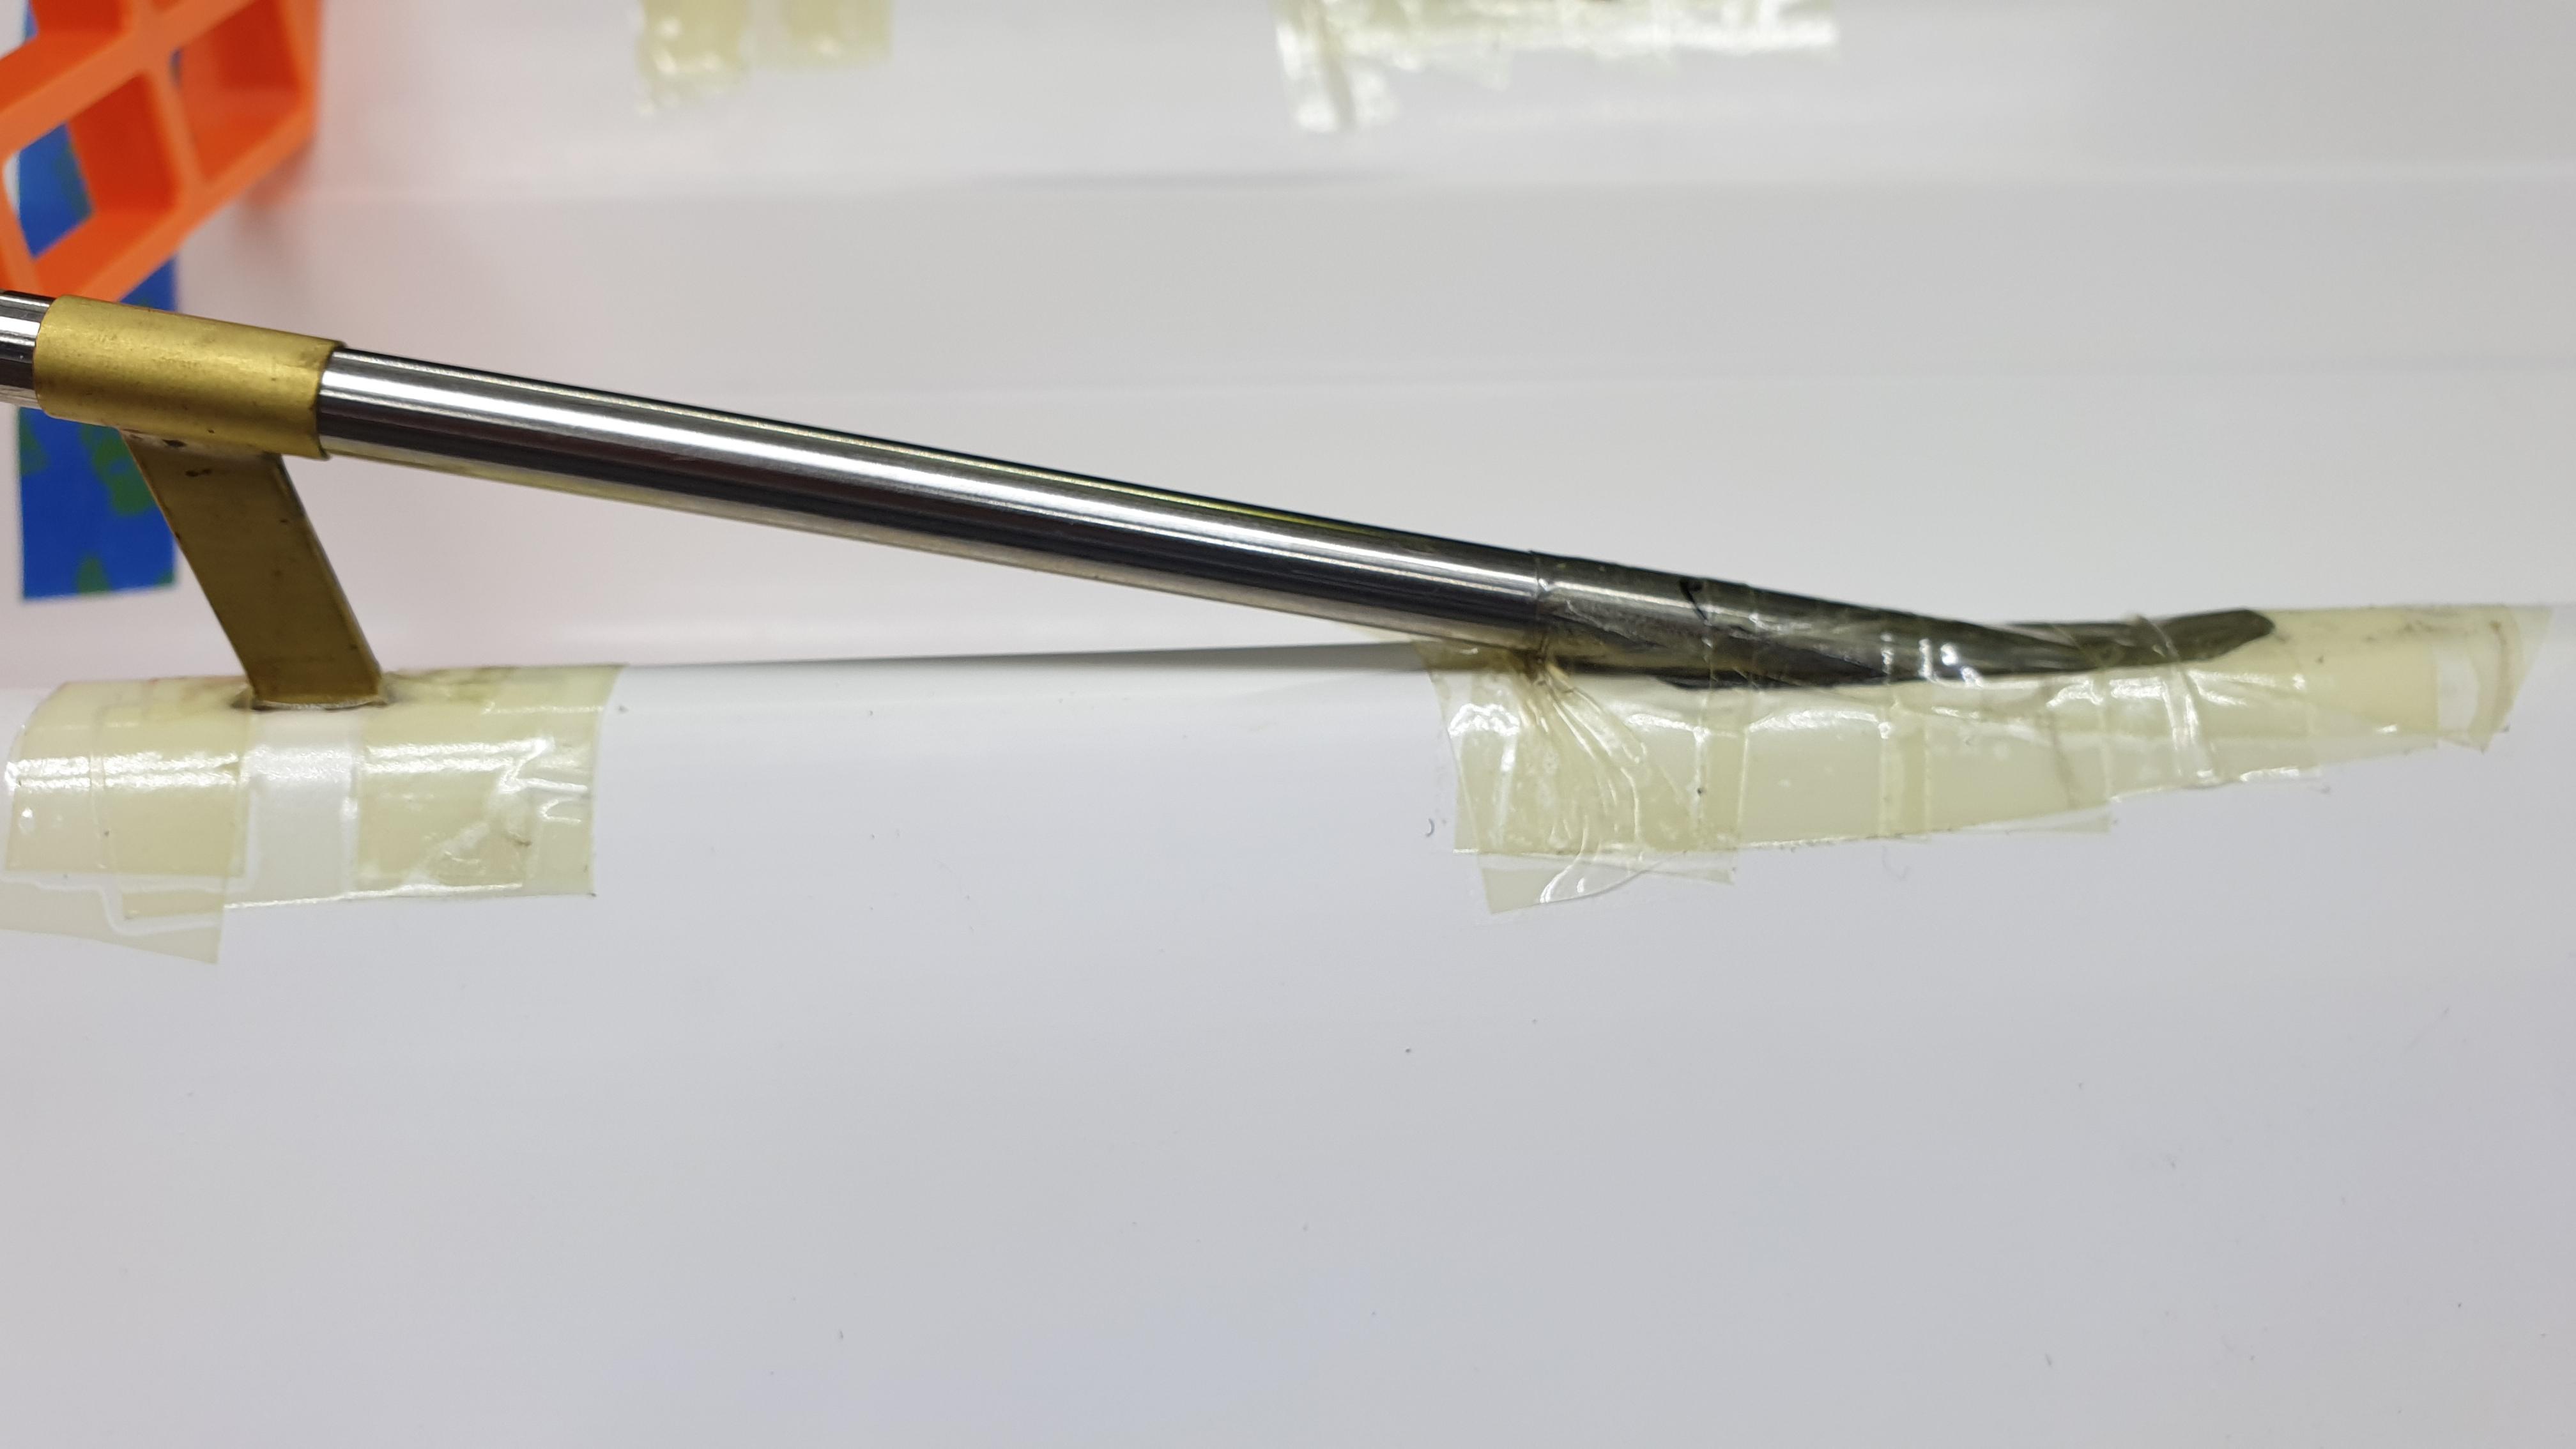
Rudder tubes installed, again using another 3D printed jig to hold them in place.
There will be a support added near the top of the tubes as well.
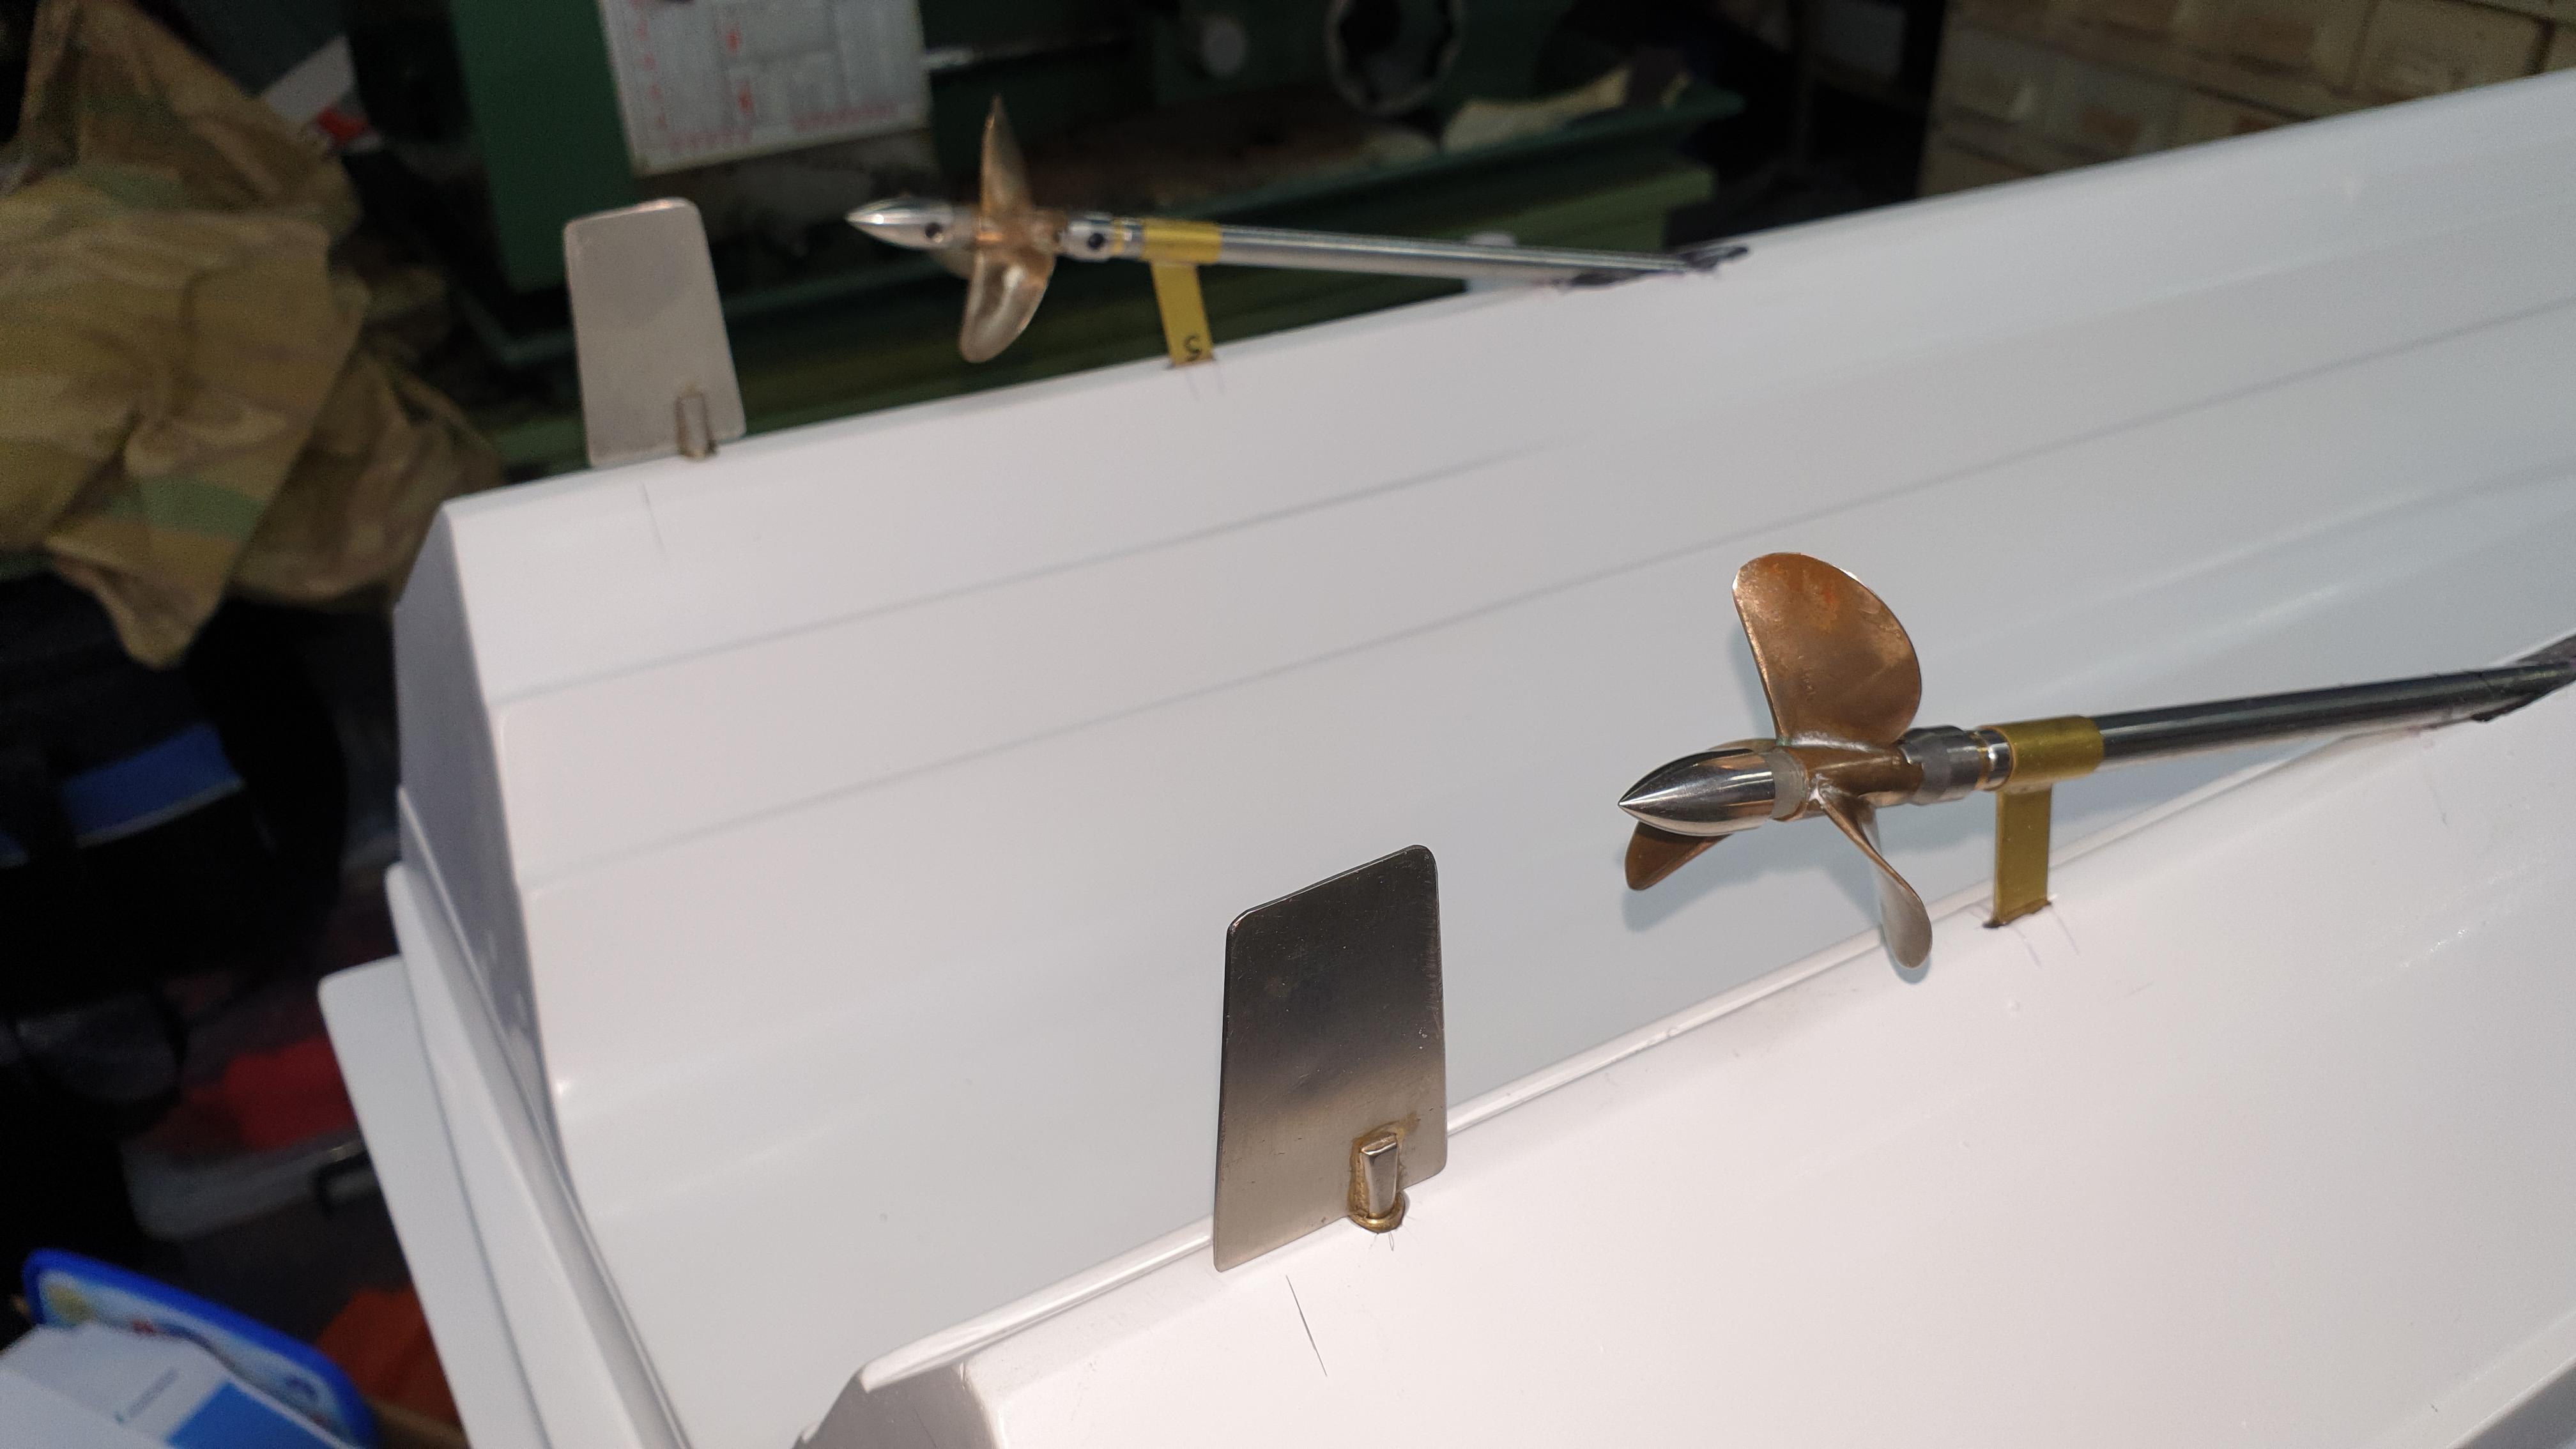
Shouldn’t be any prop walk, counter rotating props!
Shaft Install.
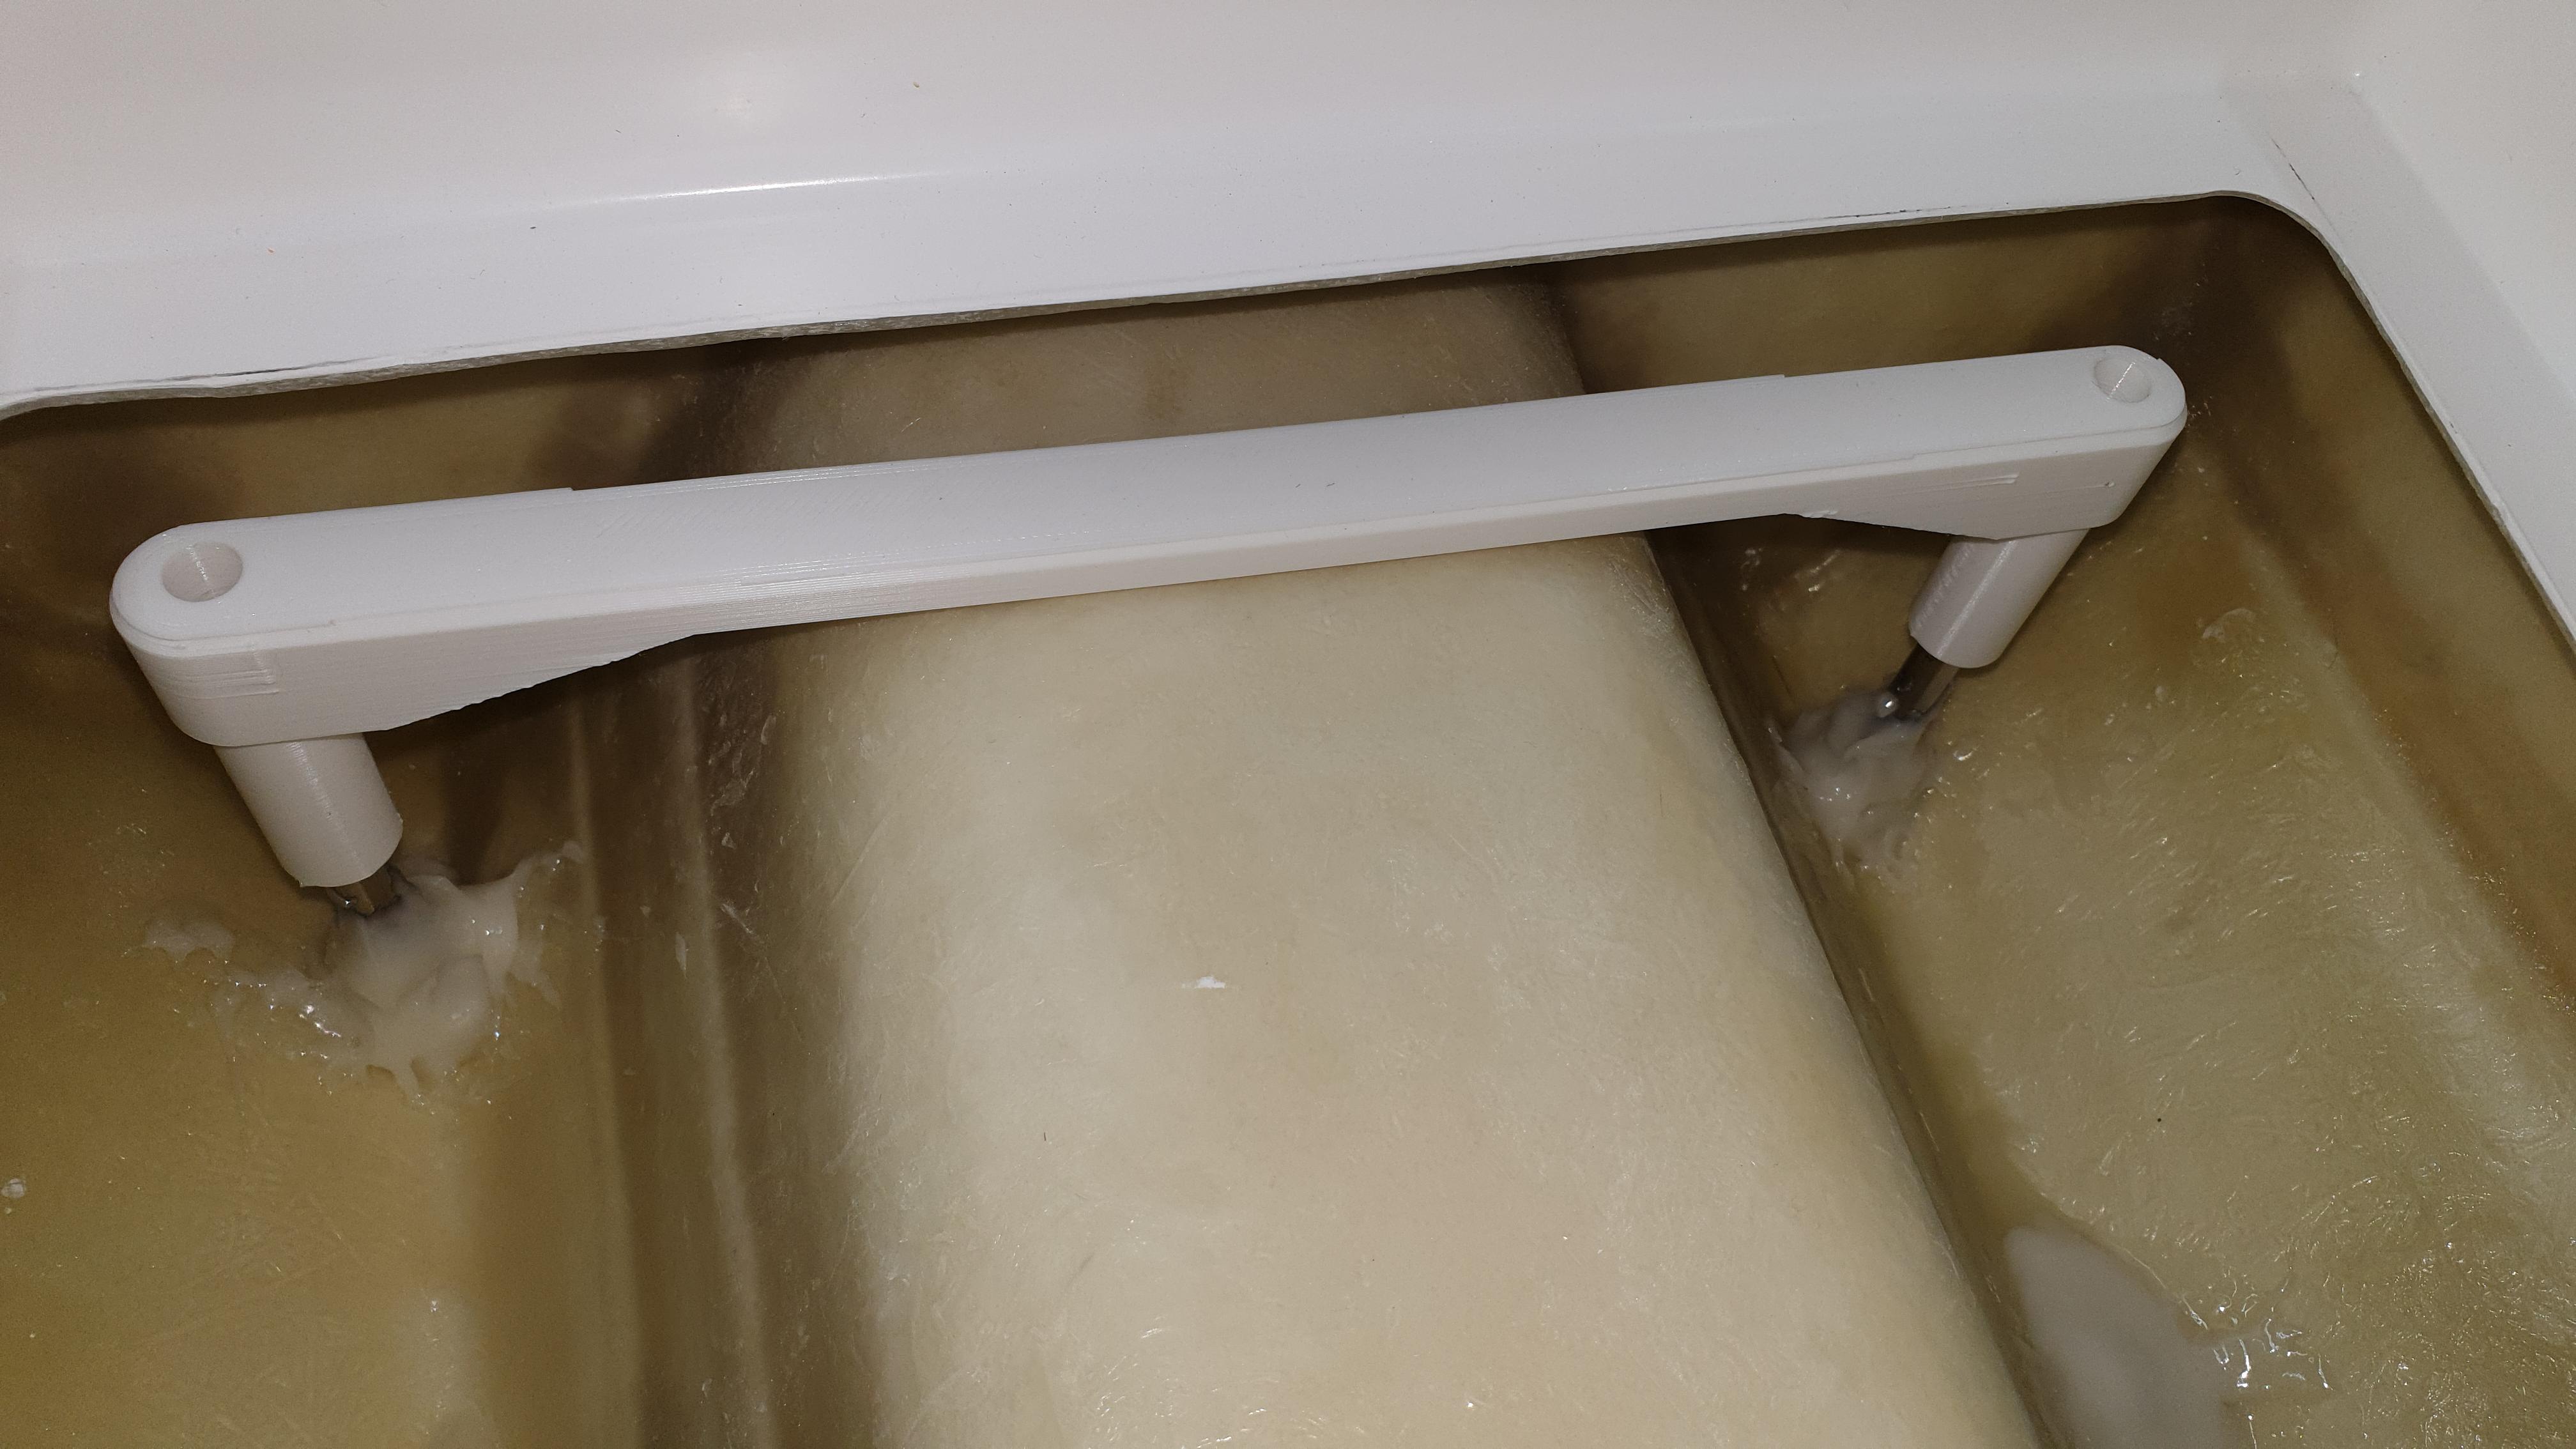
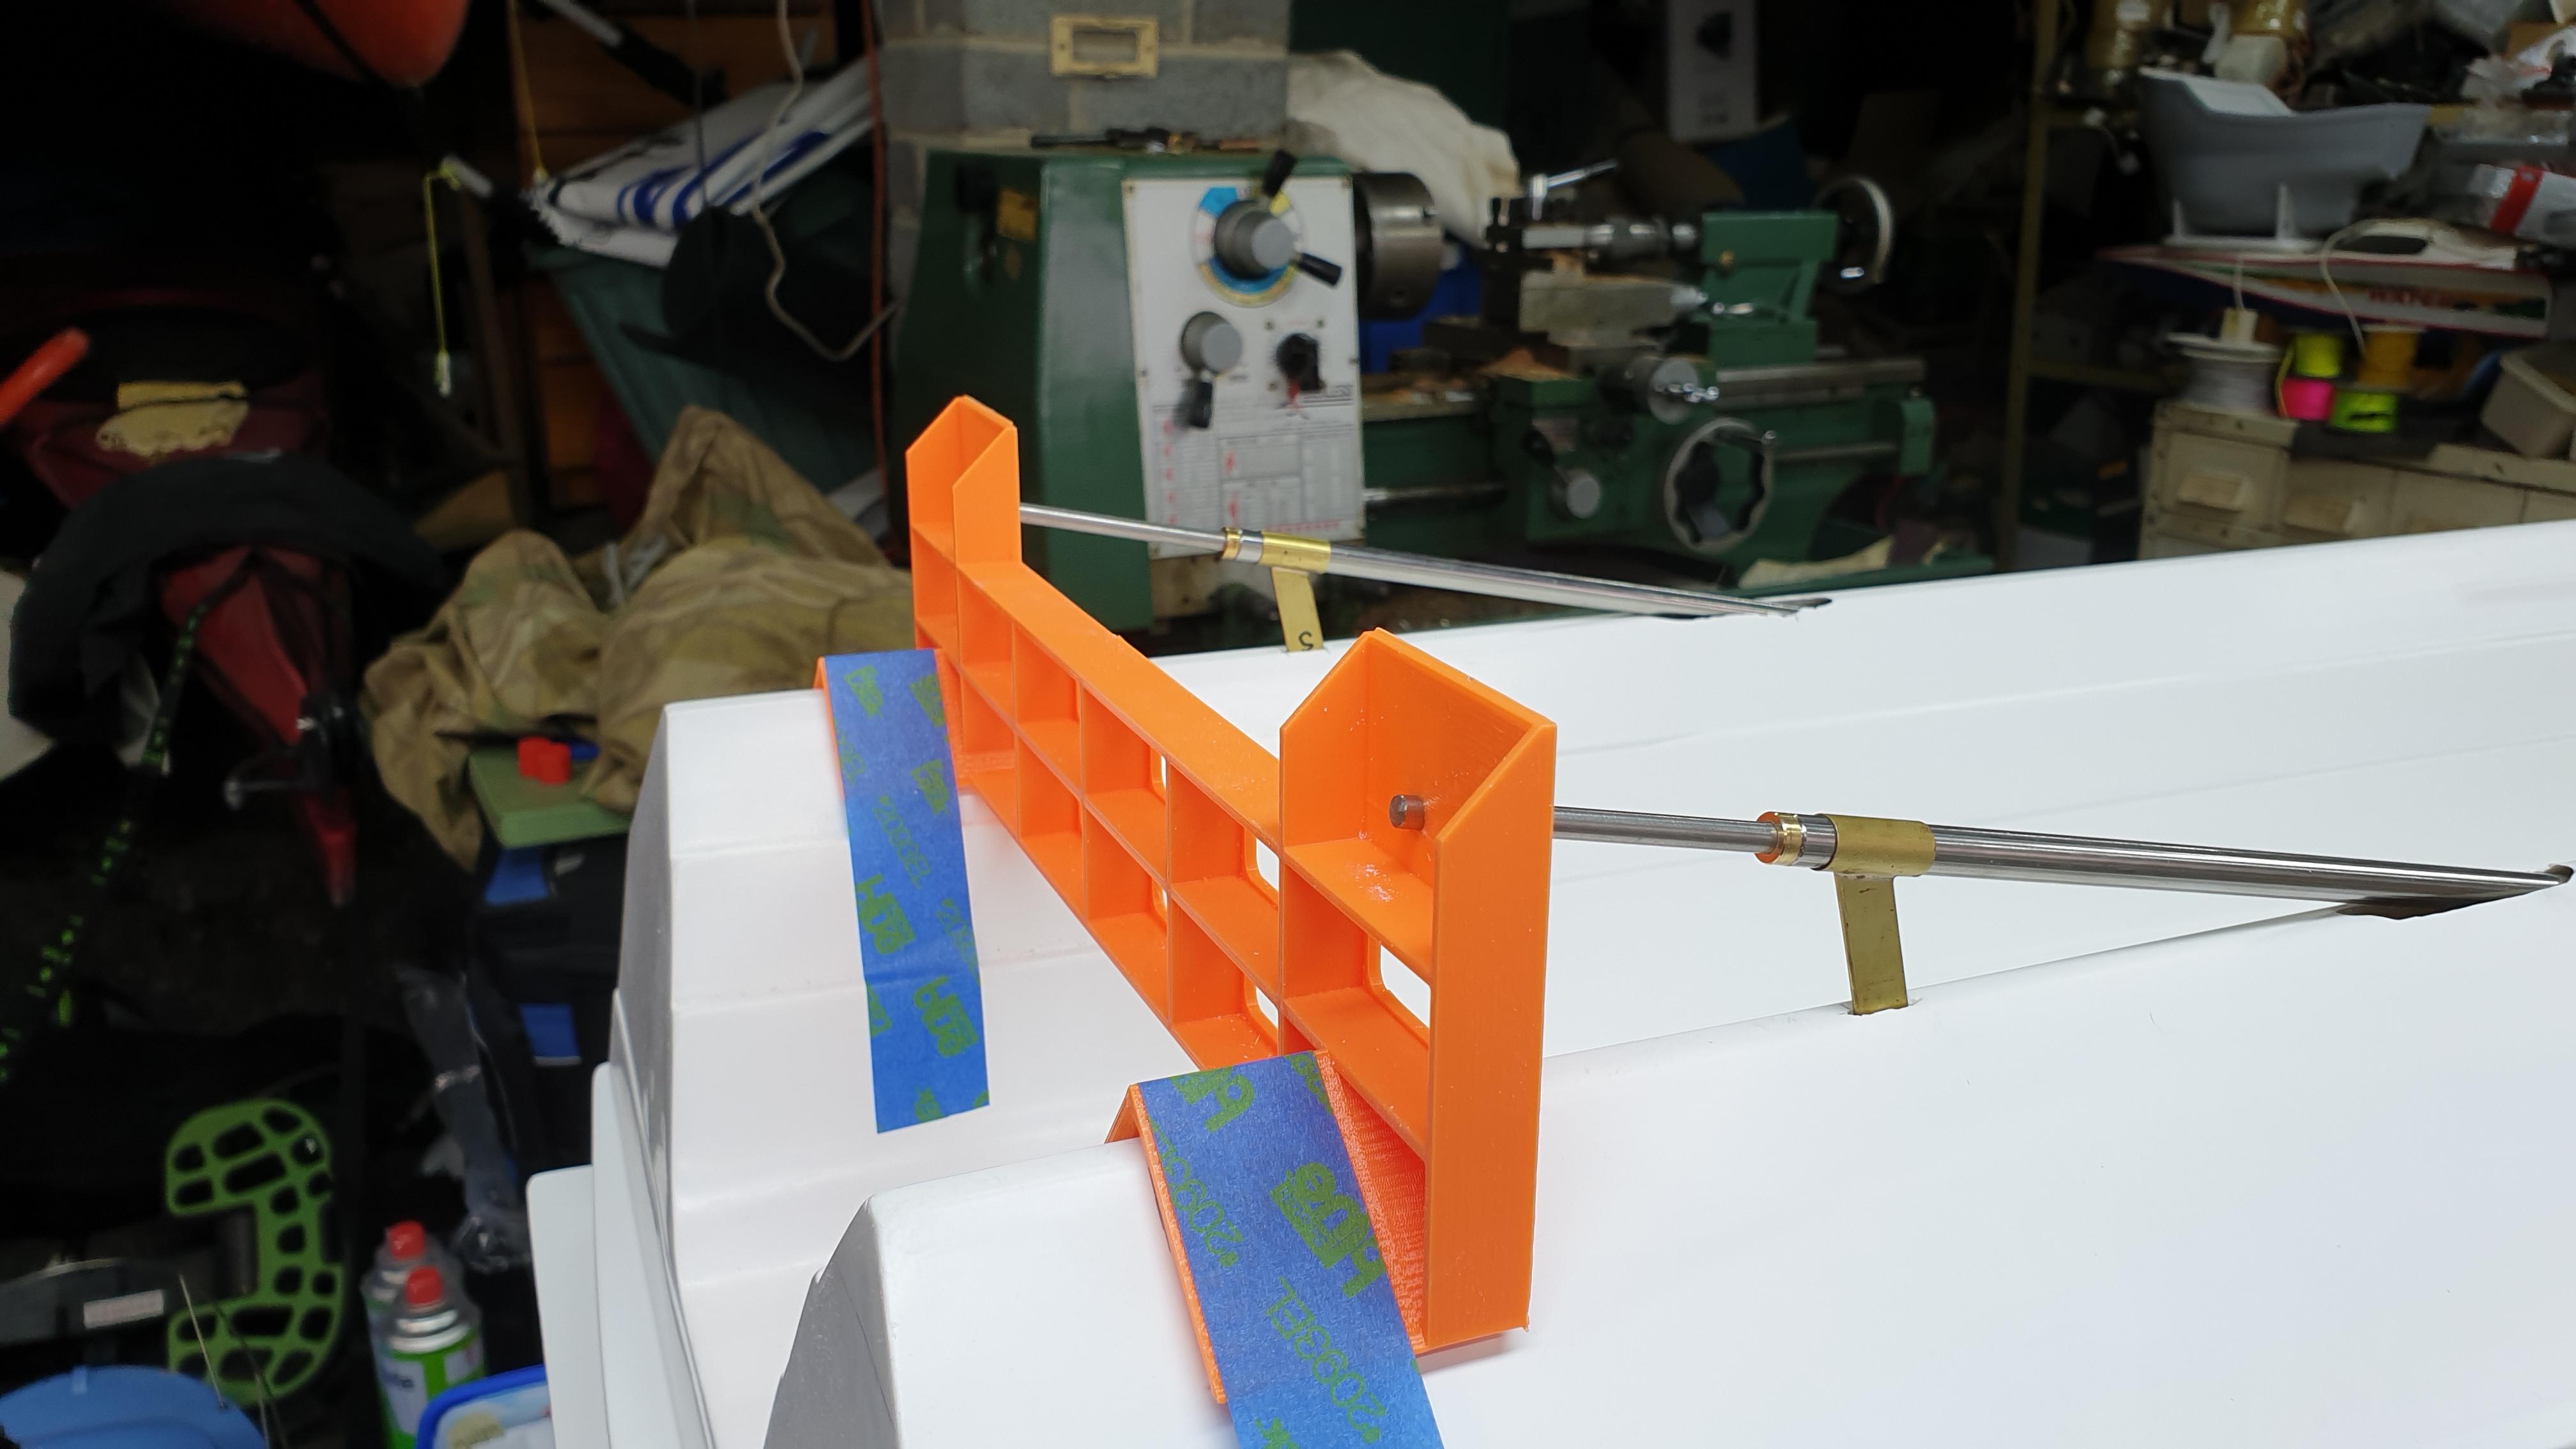
Next problem is to align and install the prop shafts into the hull, they are 235mm apart and are separated by the tunnel.
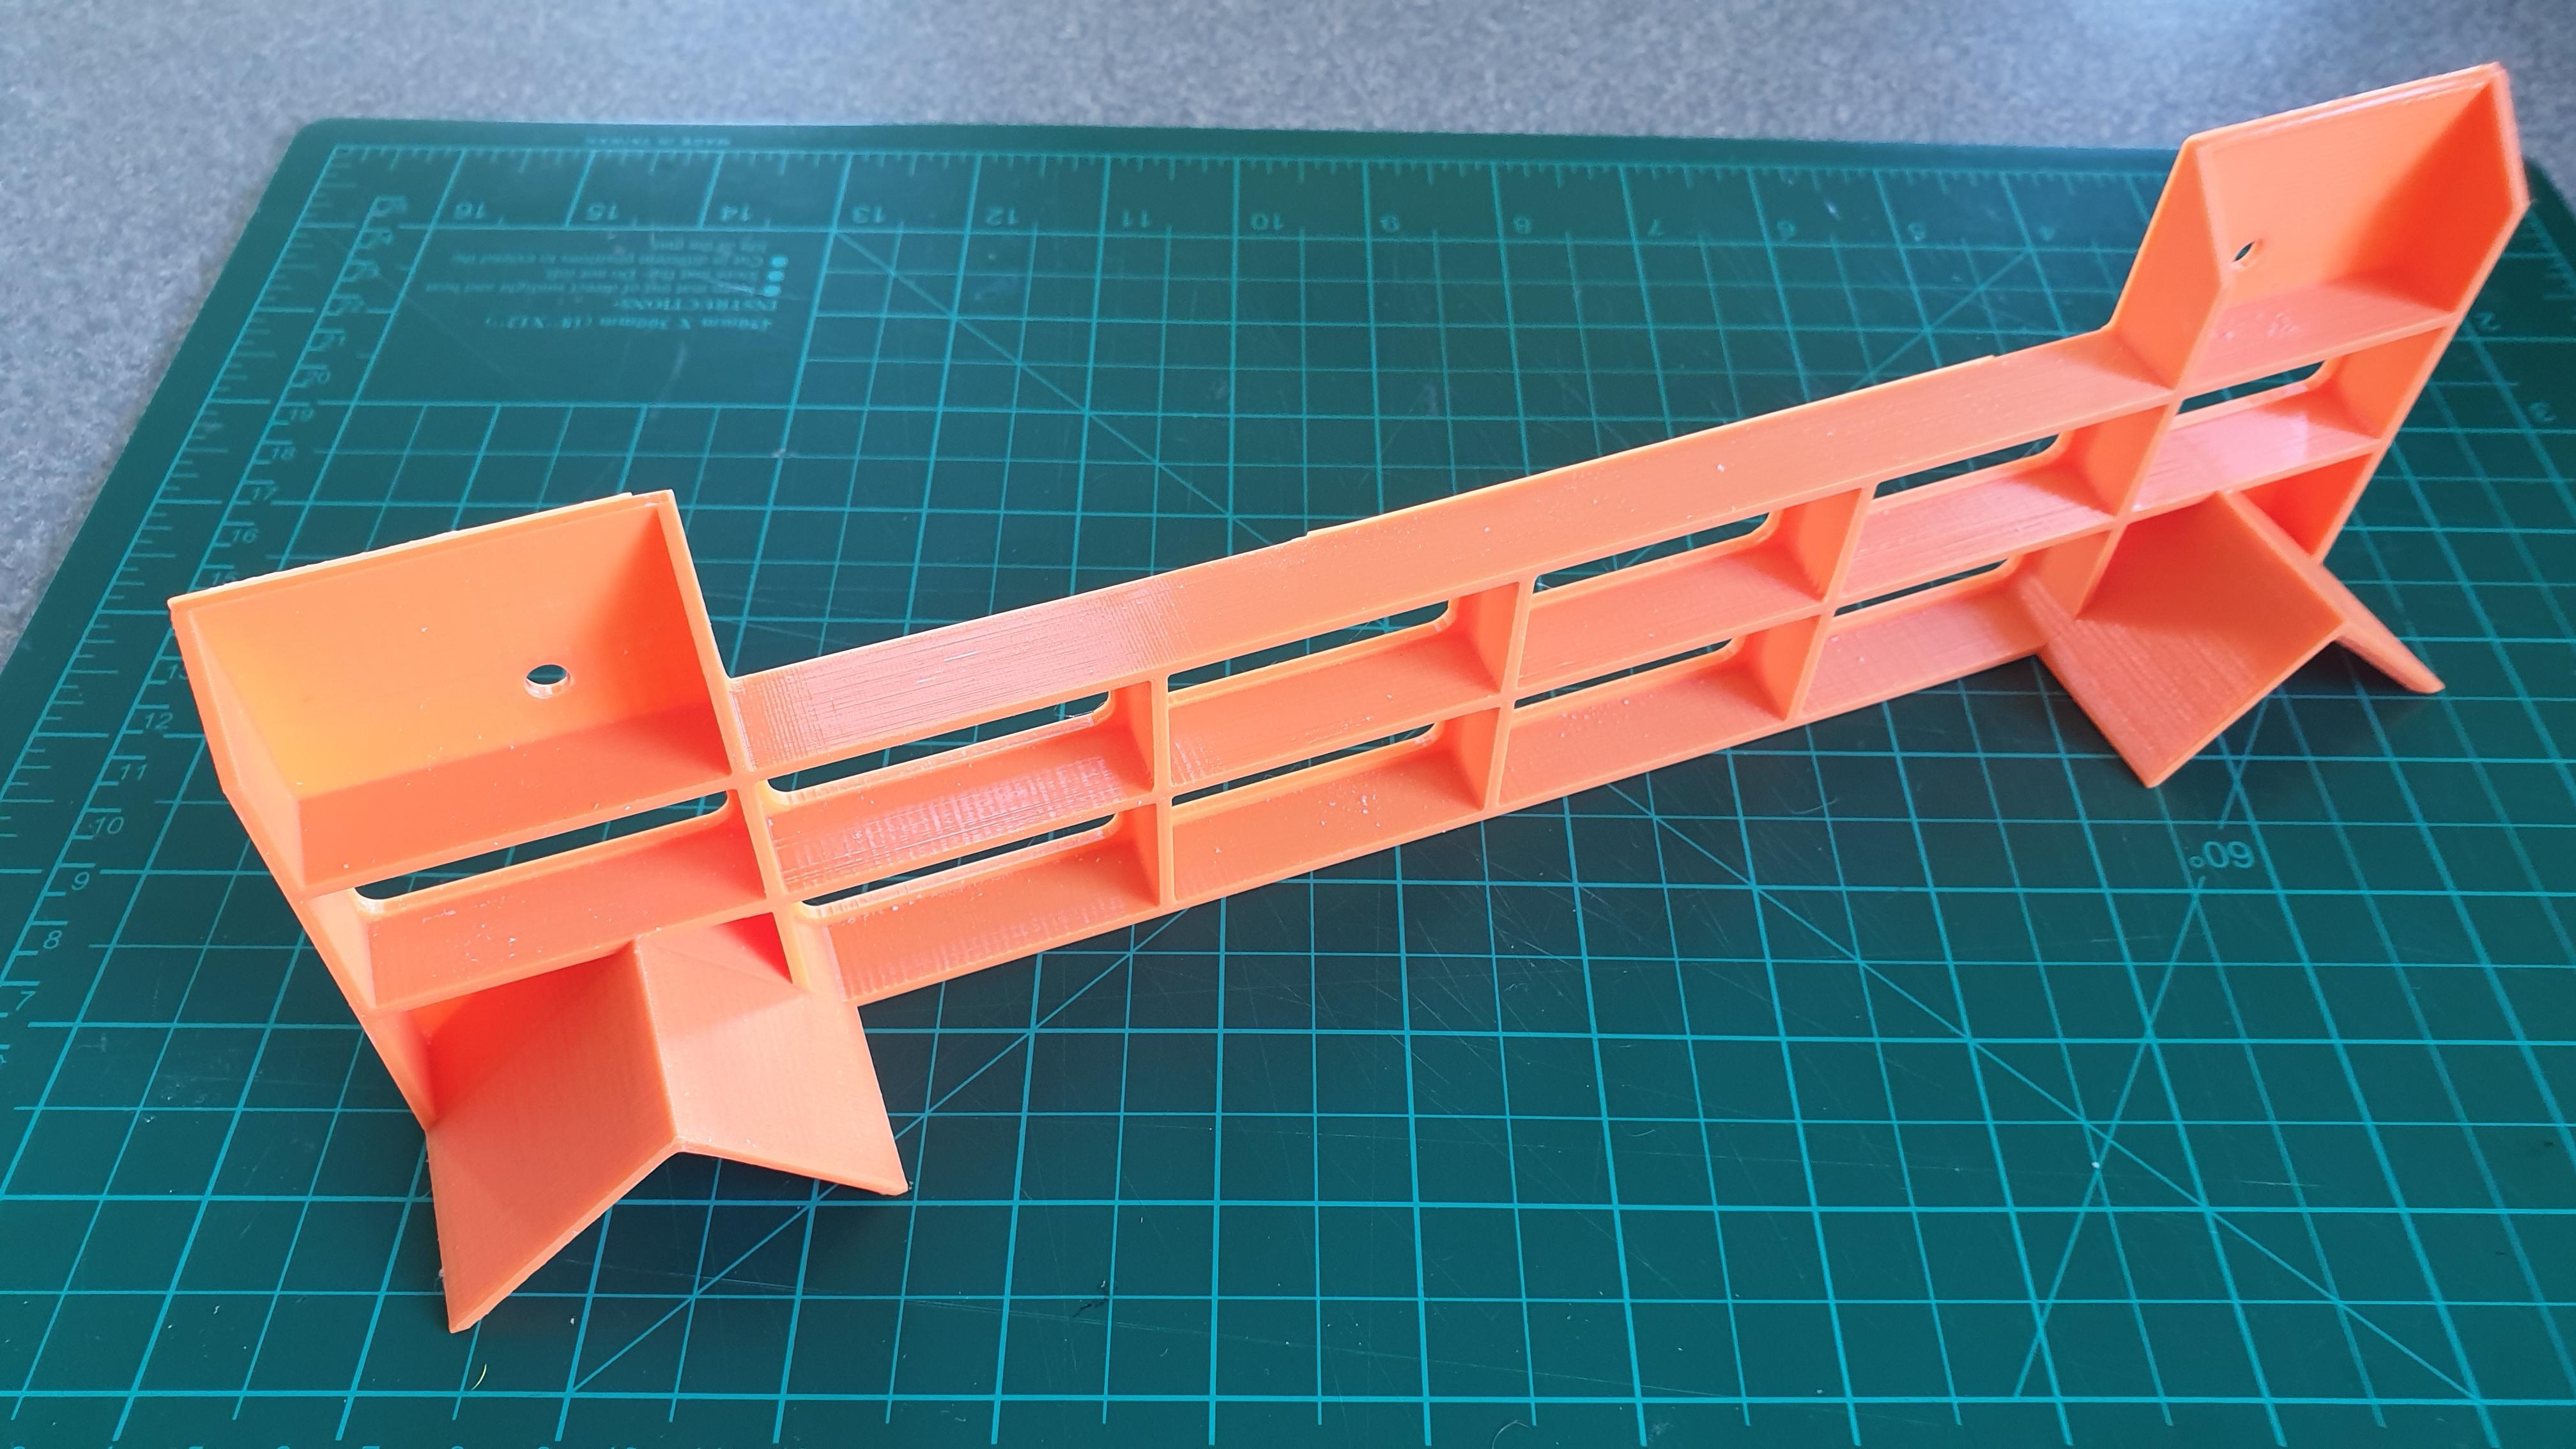
To keep them perfectly aligned I made some 3D printed jigs to hold them in place while glassing them in.
This one lines up the motor with the prop shaft.
To space them correctly and to be able to adjust the height, they are joined together with this part,
Next is this jig that holds the shafts on the outside of the hull,
Like this,
The inside jig in position
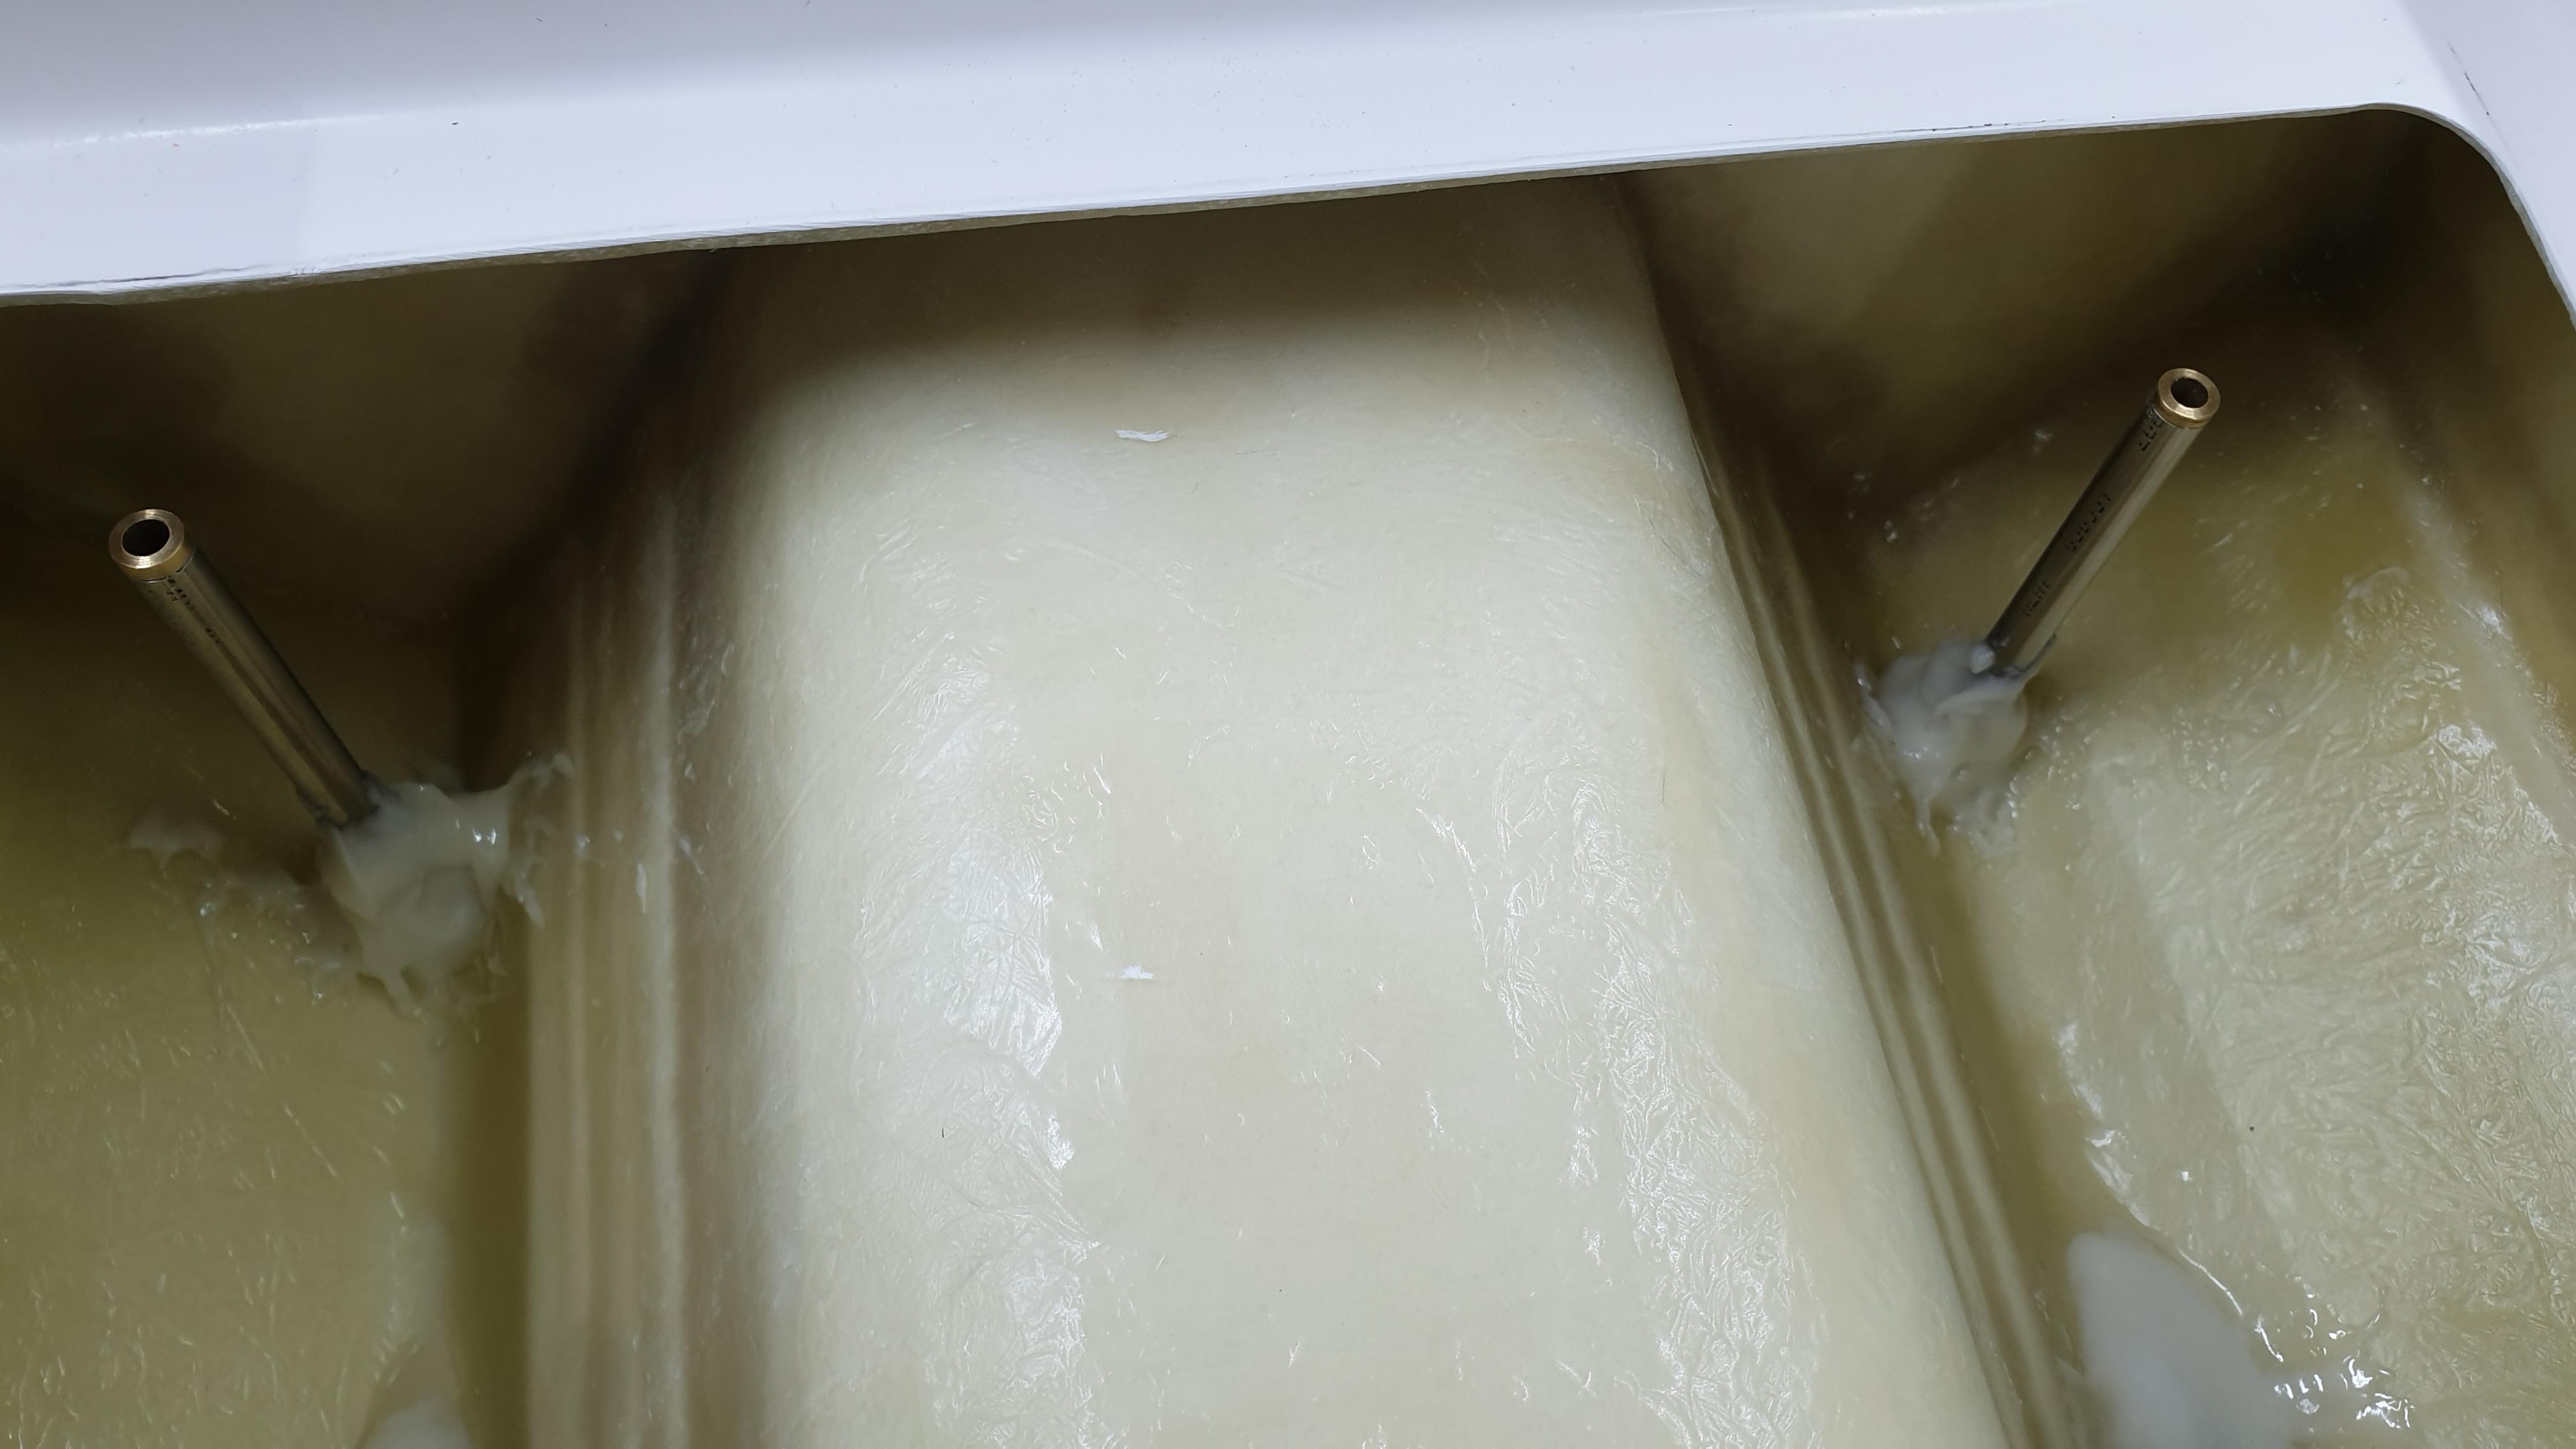
The tubes were roughened up with the Dremel and to seal the outside of the hull to stop any resin seeping through I used something that would never leak – Joysway’s Hatch Tape!
It was then just a simple task to glass the prop tubes to the hull,
Great video’s from all. Looks like I missed a good day.
Good to see Moose’s Epoch back in the air, but a shame about the Fox.
Thanks all for the encouraging words.
Next job is to install all these parts.
-
AuthorPosts